Meals & Misfortune

Memorable meals from my painful past

The School Dance

For my entire youth, I was terrible at relationships with women, even when the stakes were relatively low.

Even ignoring my fifth grade false start, I’ve had many awkward, uncomfortable, and confusing interactions with the ladies over the years. Sure, I was friendly with some girls, but sixth grade hormones re-contextualized things in ways I wasn’t prepared for. I barely had any romantic confidence, and if I somehow managed to summon my still-developing balls to talk to a lady, I would lose 90% of my brain function. Words would spew out of my mouth all at once, confusing anyone within earshot. It was like a superpower, but the only thing I managed to do was give my enemy a ringing headache, and my “enemy” was actually someone I wanted to be friends with. Shout out to testosterone, the Harvey Dent of brain chemicals.

As weird as I acted when I liked a girl, my behavior was even more strange when I found out a girl was interested in me. The first time I remember it happening was at a dance in junior high school. I’ve mentioned previously that I had a rough time during these years of my life, so allow me to pile on the sorrow. Being at school during operating hours felt like hell, but being there after hours was even worse. After quitting HTML club, due to disagreements with management (my math teacher Mrs. James) on how to operate, I tried to be inside the school building as little as possible. To me it felt like being set free after serving a prison sentence, only to volunteer to stay in prison longer. I abhorred social events in the same building. School dances were the lowest point in that pit of despair.

I tried to avoid dances for the most part. Occasionally I would buy a $10 ticket during the school day, then decide when it was time to go that I “wasn’t interested.” I was just too anxious about the logistics: would my friends be there? Would Jenny be there? Would she, or anyone else, want to dance with me? I felt like Stoop Kid trying to leave the stoop. These intrusive thoughts consistently kept me from having a good time. My experience with school dances was watching other kids enjoy themselves while I stood on the sidelines watching. Our dances were also held in the school gym, so the metaphor of being a bench-warmer was disgustingly clear. 

Of course, I wasn’t the only loner. I spent 99% of my time talking to my buddies, who were frequently in the same situation. Occasionally, a song I really liked would come on, such as Good Charlotte’s The Anthem, and I would dance like a maniac for 2.5 minutes until the excitement wore off and my haunted subconscious would start to torture me again. My sense of self worth was awful, and kept me from noticing how much I enjoyed the act of dancing, regardless of how painful it would have appeared to a spectator. It’s funny to reflect on how much I cared about what others thought as I danced to a song about not caring what someone else thinks. In the moment, I enjoyed flailing my arms around like I was trying to sell used cars. But minutes later, I would be telling myself I was a loser for dancing alone. Again, I could never have won this Academy Award without hormones. Thanks, testosterone.

The most dreaded aspect of the night was the possibility, and in my case certainty, of being partnerless for the last dance. I don’t know where the tradition came from, but our school dances ended with the full, unabridged, unabbreviated, feature-length ballad Stairway to Heaven. What used to be an enjoyable 8 minutes of appreciating a legendary rock masterpiece turned into a jealous nightmare of watching my peers smile and make cute eye contact with each other, and fall in love for the first time. Those happy demons. If only there was some way to avoid it… oh, and ask someone to dance? NO! After a public dancefloor rejection early in my career, I thought I would never have the good fortune to dance with a lady. I whined about it like a career ending injury, when it shouldn’t have even taken me out of the game. Like the band Lit, I was my own worst enemy, and would soon extend my own anxieties to someone else.

One cold winter night, I went to a dance where I, unsurprisingly, did not dance with anyone. The reason that sucks extra is because there was a gimmick at this “Winter Ball” called the “Snowball” dance. The way it worked was that everyone stood on the sides of the gym, while two people started dancing in the middle. After some set amount of time, those two dancers would go find different partners, and the four of them would dance. I was glad I wasn’t out there: all those eyes would give me performance anxiety. After another twenty seconds, they would find new partners, and the dance floor snowballed in size until everyone was dancing. Almost everyone. 

At one point, I decided I was on board with this. When most people were dancing, I thought someone would have to ask me soon. I thought this was a guarantee! I thought this meant I would finally be able to dance with someone, anyone. Unbeknownst to me, the ratio of boys to girls was skewed towards the boys, meaning that once all the girls were on the dance floor, there were a few boys that never had a partner. If you can believe it, I belonged to this upper crust of humanity. To make matters even worse, this was the same gym I had Physical Education class in, which meant I was standing on the exact same sidelines where I had been the last person picked to play dodgeball mere hours before. Now I found myself last place in personality.

I had nothing left inside. I was a hollow shell. For the rest of the night, I mostly mulled under a basketball hoop, remembering how I failed at basketball tryouts only a few weeks before. Yay, sports. I was praying for a catastrophic impact event, when I heard Stairway to Heaven come through the speakers. At first I was relieved to have just one more moment of torture before making my escape, but then something happened that I had never thought possible. A friend of mine, Michelle, came up to me and asked me if I wanted to dance. Karma! Who cares that I missed out at some snowball dance orgy. I was finally getting my shot. I also knew and was friendly with Michelle, so it would make sense that I accept and dance and have a good time, right? WRONG.

Now that the opportunity arose, I got it in my head that I would embarrass myself if I accepted her invitation. The “logic” was that since I had never done it before, I would look stupid, step on her feet, or do any number of other embarrassing things. I collapsed under the pressure of my own self hatred, and told Michelle I wasn’t interested (even though I was!). She walked back to the other side of the gym, and we literally stood under opposite basketball hoops for 8 minutes. We were like two next door neighbors shooting hoops on their own nets, rather than playing together. I would probably have gotten over a lot of the anxiety by just doing it for the first time, but some mental block kept me from saying yes. I don’t think I can keep blaming testosterone for this level of stupidity. 

After that, I stopped going to dances. If I wasn’t going to enjoy myself, why keep going? I was living in my head so much that I wasn’t able to enjoy the moment. Michelle and I were still friendly for years after that, but I don’t think we ever talked about what happened that night. I hope she never felt as bad as I did. Over the next couple years, my hormones got more manageable. I never reached Kevin Bacon-level moves, or angrily danced on a Volkswagen, but I eventually danced with someone for the first time. It was way less scary than I expected, and actually more boring than dancing alone.

Then I learned about grinding in High School, and that was the shit.

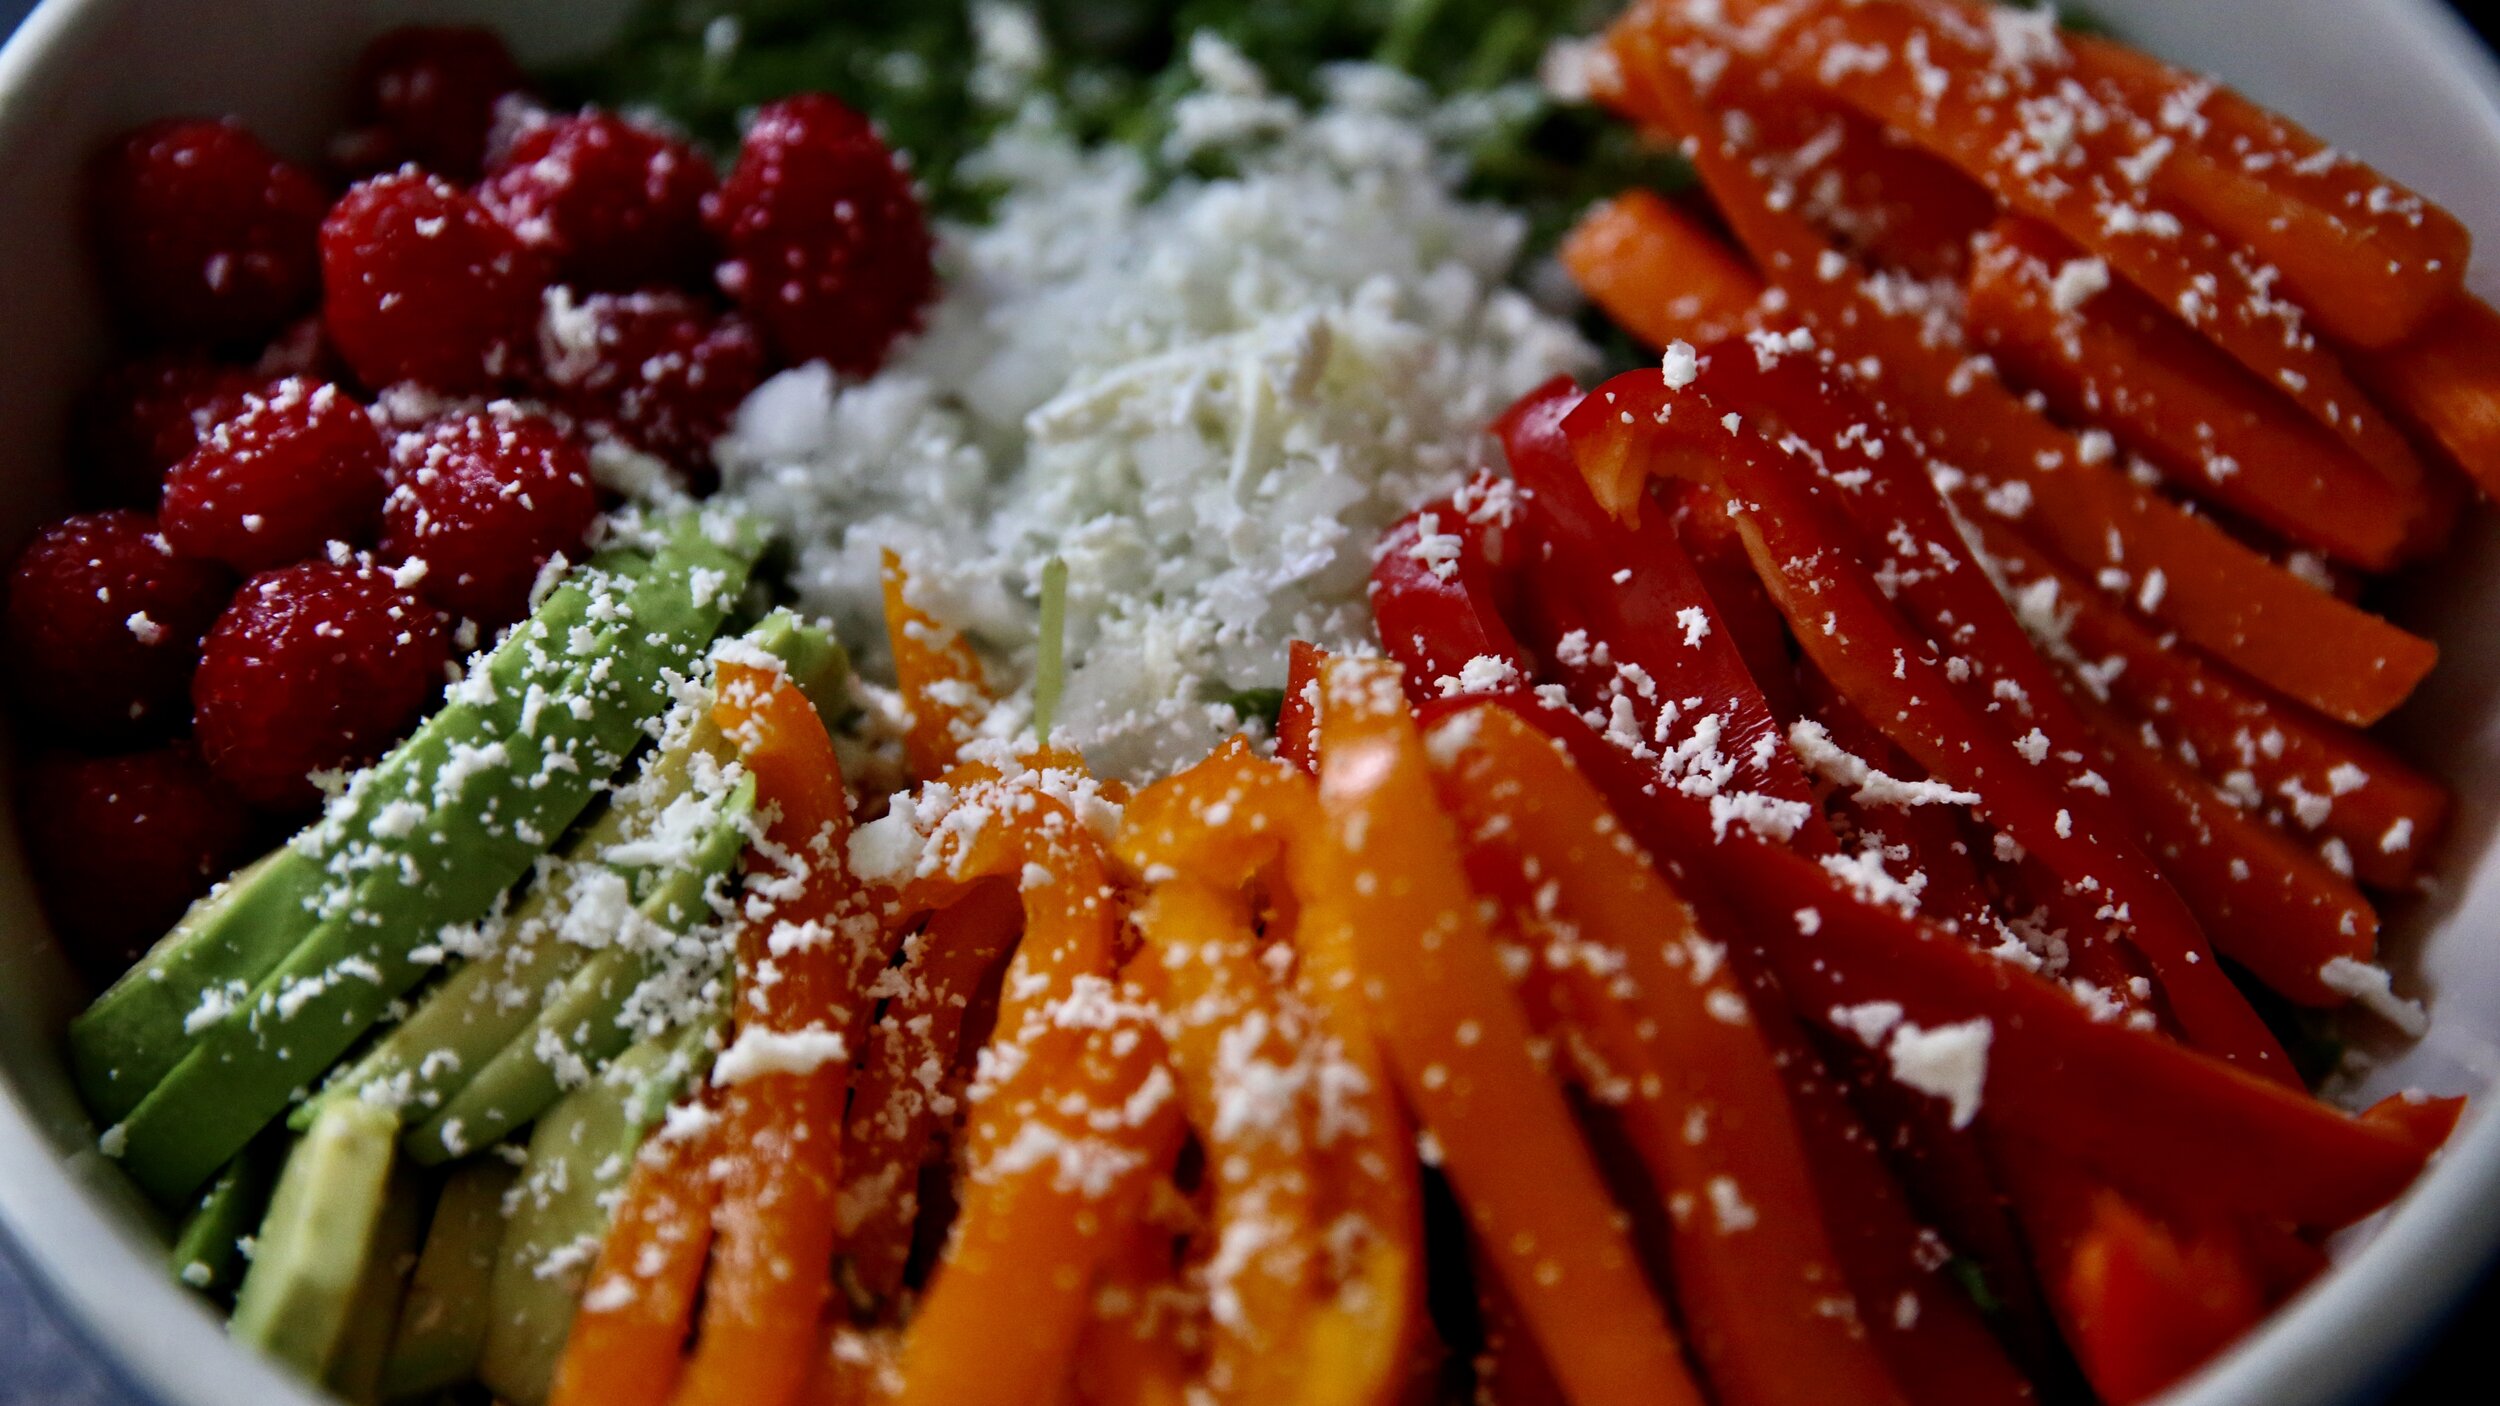
Anyways, here’s my recipe for a BLT.

BLA1.jpg

Ingredients:

Right off the bat, this isn’t a BLT. I actually hate tomatoes in their raw form, so we will be using a much better fruit often mistaken for a vegetable: the avocado. Don’t get “Dave at a middle school dance” nervous about it, as the avocado is a huge improvement over the tomato. The flavor is better, the texture is smooth rather than snotty, and the way it all combines with the bacon is a divine concert conducted by Chef Mozart himself. I really hope this delivers, because I built it up a lot. I’ve got to manage expectations better.

  • 12oz Bacon

  • 1 Piece Green Leaf Lettuce

  • 1 Avocado

  • Farmhouse Boule (Bread)

  • Mayonnaise

  • ½ tsp Garlic Powder

  • ½ tsp Cayenne Powder

  • ½ tsp Salt

  • Black Pepper

Equipment:

How many recipes have I made without using bacon? I can’t believe it’s been this many months without a heaping helping of heavenly hog. We can change all of that right now, as long as you have a stove and a pan. That’s it. Not many barriers to enter into the business of biting boars. You’ll also probably want toasted bread, so figure out a way to give that white bread a nice crispy tan.

  • Frying Pan

  • Tongs

  • Paper Towels

  • Plate

  • Small bowl

  • Toaster or additional frying pan

Active prep total: 15 minutes

Clean up: 8 minutes

Here it comes. As a child, you struggled to find yourself. You dwelled on negative experiences, which led to more negative experiences. But that can all change right now. From here on out, you will learn from your mistakes. You will separate the things you do control from everything else, and then you will act on the things you can control. As you improve yourself and get better at whatever it is you are trying to accomplish, small but positive experiences will lead to full on success. You’ll go a long way with a positive attitude, coupled with a drive to be better than you were yesterday. Let’s kickstart the improvement process by making this succulent swine sandwich.

BLA2.jpg

Instructions:

  1. Carefully place bacon strips in a frying pan at medium heat. If you have a splatter guard, use it. What do bacon and camels have in common? They both spit at you, so protect yourself when you are able. Do not crowd the pan. You want every square inch of your strips to contact the pan. It may take a few extra minutes to cook all the bacon, but you will avoid aggressive spurts of oil, and cook the bacon more evenly. This is the way.

  2. As the bacon cooks, the fat melts into grease, and the muscle fibers begin to contract. The bacon shrinks. The bottom side of the bacon will turn brown and become crustier and crispier. I’m telling you this so you can decide when the bacon reaches your ideal crispiness. Just make sure it is brown and crispy, or cook it for 7 minutes on each side if you are having trouble determining when it is done. DO NOT EAT RAW PORK. Doofus. 

    1. While the bacon is cooking, you can make some avocado smear. Cut up your avocado in any way you know how, but please throw out the skin and pit. If you eat either of those, it is your fault. Gross. Combine your Avocado, ½ tsp Garlic Powder, ½ tsp Cayenne Powder, and ½ tsp Salt in a small bowl, and mash it all together with a fork. Make sure to keep checking on the bacon.

    2. When the bacon is almost done, toast up 2 pieces of bread. A toaster works great. Otherwise, improvise. Grab another frying pan and a can of nonstick spray, and figure it out. Sure, you might burn some pieces, but you will learn. That is the name of today’s game: make mistakes, but don’t repeat them. Is this too extreme a lesson for toast? No, it’s the right amount of insane.

  3. When the bacon is perfect in every way, move it to a paper towel covered plate. This will absorb the excess grease, and prepare your bacon for the sandwich. Now it’s perfect in even more ways.

  4. Assembly time! Grab your now toasted bread, and cover one side of one piece with mayonnaise. This will be the base of your sandwich. I prefer to go light on the mayo, but I hate light mayo. The real stuff will do nicely, and you can use less of it if you’re trying to be healthier. A little goes a long way.

    1. Get a piece of washed (no dirt/sand/truck residue) Green Leaf Lettuce, and place it on the mayo bread base. Now things are starting to look like the front page of a food blog.

    2. Take that bacon and load up your sandwich. Use as much or as little as you want, but just know I used six pieces and got a tummy ache. It hurt, but I see it as a positive since I won’t do it again. Learn from the failures so you can eventually talk to women. Also, sprinkle some ground black pepper on the sandwich. That won’t help you with women, but the failure will literally taste better.

    3. Finally, smear some of that delicious avocado on the unused slice of toast. Lay it on as thick as you want since it will easily cling to the bread. When the toast is avocado-ed, complete the top of your BLT skyscraper, and take a moment to say a thank you to yourself. You put in the work, now it’s time to reap the benefits..

That’s what I am talking about. The hot, crispy bacon plays perfectly with the avocado, creating a crunchy, chewy, savory, and holy experience. The ingredients combine in your mouth in a way that needs to be experienced to be described. Even then, your words, much like when you were in Junior High, wouldn’t be enough. Spewing nonsense would only serve to confuse your friends and turn away strangers. But today that doesn’t scare you. Today you realize that some things just take time to work out. You aren’t a bad person, you just need to learn how to do something new. Do not let a single interaction define your life. Take your seat in the pork penthouse, and use your status as Chief Eating Officer to give yourself a moment to figure out how you want to handle the next situation. Maybe when someone offers to give you something you want, take ten seconds to figure out how to reply rather than just saying no. Making decisions out of kindness for yourself and others is a much better way to go through life than constantly having anxiety and being afraid of everything. 

Or, I could be an idiot, but you’ll have to try for yourself. If worse comes to worst, you’ve still got a BLT (A).

Join me next week for more Meals and Misfortune.

(Or, check out last week’s delicious disaster!)

BLA4.jpg

Waking Nightmare

Over the course of my life, I’ve become a huge fan of the horror genre. However, scary movies haunted my daily life as a child.

The first horror movie I remember watching was A Nightmare on Elm Street. I was only seven years old, and not in any way prepared for the crippling anxiety it would bestow on my youthful mind. My brother, Jon, and I were channel surfing in the middle of a Saturday, and the public broadcast edit of the classic slasher caught Jon’s attention. My preference would have been Judge Judy, but he had the remote, and anything I said in protest would be overruled. He assured me this was a fine movie, in the same vein as Aladdin and Toy Story. Persuaded by his arguments, I agreed to watch the abominable daydream. I don’t know if Jon had ulterior motives, but even if he did, I don’t think any of them were to cause mental anguish. I hope not. Jon?

Freddy’s first appearance in the movie made me sick to my stomach (that or my Pop-tart-only diet). His melted face and lack of eyebrows were far more real than anything I’d seen on the cover of an RL Stine book. Despite my fear and case of bubble guts, I pushed through and watched the subsequent eighty minutes while on the verge of tears. I tried to distract myself, but realized Freddy likes to attack daydreamers. The movie began to feel like a documentary, and I hoped my white belt in Kempo karate would earn me some protection when I would inevitably become the next victim.

For the next few months, I slept with a nightlight on, as if that could keep Freddy from killing me in my dreams. When I realized I needed more bedroom “defense,” I turned my closet light on too, but then it was too bright for me to sleep. No matter what I tried, I couldn’t get any rest, I was having nightmares, and I developed a sense of dread that led to constant paranoia. I was looking over my shoulder as if I was even old enough to owe money to an unsavory person. Anytime I went to the bathroom, I would pull the shower curtain back or check the vanity drawers to see if there were tiny murderous “debt collectors” hiding in there waiting to collect. Did I mention I was only seven years old? At that age, it seemed entirely possible that death could be hiding around every corner, waiting to drag my sinful but childlike soul to the grave.

Eventually my fear of Freddy dissipated, but my imagination started to play up other terrors. Anything could be interpreted as evil. Creaks in my house were meandering zombies, a hat left in the wrong place was the work of a vengeful spirit, and my sister was actually an alien/cyborg replacement that could vaporize my brain with her mind. Even Halloween, known for being a lighthearted and not very scary night, was legitimately terrifying. I stayed out of my friend’s haunted basement during the Monster Mash, because I thought the other kids were actually the creatures they dressed up as. It was embarrassing to stand alone in the garage as everyone else was enjoying their “innocent scares,” but for me, there was nothing innocent about it. I worried they would run up from the basement and devour me like a horde of zombies. When I realized my buddy dressed as Frankenstein had rubber bolts in his neck instead of real ones, I relaxed a bit. Maybe a bit too much.

The next time I watched a horror movie, I was in seventh grade, and almost twice my age from the Nightmare on Elm Street incident. I was sleeping over at my friend Jordan’s house, and we spent most of our time playing video games. Pre-teens playing video games? Give this guy a Pulitzer. Jordan had a Playstation 2 in his room, which was the coolest thing ever considering I had a supervised 30 minutes to play a Game Boy Color. Comparing an unsupervised, M-rated game sesh in your room to Big Brother’s GBC is like comparing a Ferrari to the 2002 Honda Accord whose transmission I just rebuilt for the second time. Jordan and I spent a few hours terrorizing locals in Grand Theft Auto: Vice City, until Jordan’s older sister, Kelly, invited us to watch a movie with her and one of her friends. Normally, I avoided my friends’ siblings like they were cootie-infected demons, but I thought Kelly was beautiful. I jumped (literally) at the chance to hang out with them, without even asking what movie they were going to watch. I thought, “What’s the worst that could happen?” 

Jordan and I went to Kelly’s room (TVs in every bedroom? Is this Bill Gates’ house?), where she started up the DVD player. When the title screen popped up, I realized I had been a far-too-eager beaver. The selection screen showed a creepy whitefaced doll with red targets on his cheeks, riding a tricycle because I guess murder dolls can’t balance on two wheels? I of course instantly recognized Saw from its grotesque marketing, and promptly experienced the first of many (thankfully) imperceptible panic attacks. What I’d read on Myspace was that Saw was supposed to be one of the goriest, scariest movies ever made. I remember seeing it on the cinema marquee in town, and vowing to avoid it at all costs. Just a few months later, here I was, faced with a difficult choice: hide my terror while hanging out with a pretty girl, or uphold a wimpy vow and deal with a lifetime of embarrassment?

A smarter person would have found a smooth way out. I could have easily told them I had already seen the movie! But in the moment, I didn’t see any other options. I buried my feelings, put a big fake smile on my face, and settled in to repeat the Nightmare on Elm Street incident all over again. Here comes General Malaise 2: Electric Boogaloo. I was already having issues within the first few minutes: the opening scene featured a dead man surrounded by blood and guts, sprawled on a super dirty bathroom floor. Grody. Thirty minutes later, the main characters were still stuck, and I realized this would be it for the entire movie. I hoped that the consistent setting would allow me to acclimate like trying to swim in the ocean, but Saw was more like a Polar Plunge I wanted to sprint away from. I felt like the torture from the movie was actually happening to me. Even Imax couldn’t touch this level of immersive cinema. Kelly had given me a blanket at the start of the movie, and I tried to seem goofy as I “jokingly” hid underneath it. I was actually keeping a panic attack at bay. I used this strategy on and off for the entirety of the movie, until it lost any semblance of being a joke. I watched the finale, where funny Robin Hood cut through the raw meat in his leg, while cowering under the blanket, and found myself at least somewhat relieved when it was over. My dreams of impressing Kelly were long gone, but I hoped I could at least salvage a decent night’s sleep.

I would have settled for laying awake in comfort. As if the movie wasn’t terrifying enough, Jordan’s house was in the historic area of town. If my little hometown had a Haunted Tour, this street would be on it. This was my first time spending the night, and I hadn’t even seen the whole house to know what I was dealing with. On most sleepovers, I would put together a background noise profile in the day to help anticipate the nighttime sounds to expect. Jordan’s house made all kinds of unsettling sounds, each indicating another monster that could haul me away to a torture dungeon. The place was huge, and whether it was true or not, there were rumors that it had been used as part of the underground railroad. That wasn’t so scary in and of itself, but there were also rumors that someone had found human remains in the hidden basement. Great, the torture chamber is right here. I don’t know if any of this is actually true, but in my twelve year old brain, it may as well have been written in stone or at least on Wikipedia. I didn’t sleep at all that night, tossing and turning with every creaking of wood or rustle of wind. I think I nodded off for about an hour, but I had nightmares of ghosts coming down seemingly endless hallways to eat my soul. 

The next morning, Jordan’s mom made us pancakes, which I ate while staring blankly at nothing in particular. Shortly after, my mom picked me up and we headed home. I couldn’t wait to hop on the couch and catch up on the sleep I had missed the night before. Mom could see I wasn’t well rested, and asked how everything went. In the safety of our car, I told her everything about watching Saw (except for my one-night crush on Kelly), having nightmares in the haunted house, and my subsequent exhaustion. She was a little upset, more at the situation than anyone in particular, and told me I shouldn’t hang out over at Jordan’s house for a while. Uh, yeah mom, no argument there. I already decided I didn’t want to get killed by a ghost.

Anyways, here’s my recipe for steak.

Steak 11.jpg

Ideally for the Saw comparison to make sense, I would be using a T-bone steak. However, I tucked under the blanket so quickly during the finale, I never saw bone. That’s karma telling me to think before I blindly agree to a late night movie in a haunted house. I learned a little bit of everything that night, but mostly how annoying it is to be afraid all the time. Instead of being afraid, put some steak in your face. Steak your face. Steak it. Keep steaking it...

  • 2x10oz Ribeyes

  • 1½ Tbsp Salt

  • 2 Tbsp Butter

  • 3 Sprigs Rosemary

  • Ground Black Pepper

Equipment:

You need a cast iron pan. You need a cast iron pan. Do I sound like a broken cast iron pan? Replace me. You need a- Ok, a cast iron pan will help, but you can use a nonstick pan of any kind. Oil up your new cast iron pan, and steak it. You’ll be glad you stopped reading this.

  • Cast Iron/Nonstick Pan

  • Tongs

  • Medium Sized Container

Active Prep total: 15 minutes

Clean Up: 10 minutes

Time to experience one of the most redemptive meals of my life. We are using the near-holy experience of a delicious meat hunk to fight back against years of molten-faced-nightmare anxiety. These bold flavors will inspire you to be bold. You can constantly worry about nothing, or you can let your mind get distracted by the enjoyable moment right now. What better way to bring you to the present than a slab of meat. And your dreams for a better world. You are a true American hero.

Instructions:

Steak 22.jpg

0.   A zeroth (<whatisthat) instruction? That’s right, you have to salt the steak in advance. This allows some fancy french science to happen, making your steak into a better steak. Cover each side of your 2X10oz Ribeyes in salt. Place them in your medium container, and stick in the fridge for 24 hours. It may be hard to delay your gratification, but it makes the final product that much better. If you can’t wait 24 hours, simply salt and pepper right before applying heat to your meat. Heat meat. Hot mot. Nope, that doesn’t work. Salting in advance will.

  1. Set your (brand new) Cast Iron Pan on high heat for 3 minutes. I had mine set two clicks down from maximum heat, which doesn’t mean you shouldn’t put in maximum effort. Add black pepper to your steak. No one wants a pepperless steak. When the pan is hotter than hell, place both steaks on. You should hear it hit the pan with a romantic sizzle, and that means all is right in the world.

  2. Leave them cooking without moving them for one minute, then flip. The secret here is to develop a good crust, while also cooking the steak evenly. This dance is the key to balance in life itself, and to keep the steak medium rare. But primarily for life balance.

  3. Continue to flip once every sixty seconds. When you are about 4-5 minutes in, add in your 2 Tbsp Butter and 3 Sprigs Rosemary, and keep flipping. Remove the steaks after another 3 minutes, and lay delicately on a plate. Admire the beautiful bronze glow.

Well, what do you know. All that fear and anxiety led to this delicious steak. Let those memories of fear, dashed expectations, and sleepless nights melt away in the delicious intensity of red meat. The hot, buttery, salty experience is a warm, cozy blanket on a cold winter night. The steak’s iron is now flowing through your blood, protecting you from ghosts. The hugs-all-over feeling of safety will turn your focus away from the negative, and into the positive. Things will get better. Don’t be so afraid of nothing. Maybe next time you watch Saw, you’ll make it to the bone.

Happy Halloween.

Join me next week for more Meals and Misfortune.

(Or, check out last week’s delicious disaster!)

Steak+33.jpg

Close, But No Cigar

I have always had a love-hate relationship with cigars.

I had an asthma attack when I was a kid–too young to even remember it happening. I was “fortunate” enough that it turned out to be an isolated incident, but I lived with the fear of triggering another that would persist for years. For all I know, my “asthma” was a ruse made up by my parents to keep me from doing anything cool. Looking at my popularity (or lack thereof) as evidence, it worked. I avoided smoking, or even being around any kind of smoke until after my senior year of high school. My risk-averse mentality extended beyond smoking, and I refused to engage in any generally accepted high school shenanigans as a result. This contributed to a social status that was somewhere between dirt and worm. In retrospect, being uncool was a reasonable price to pay to avoid destroying my young brain with unnecessary chemicals. Thanks Mom, I guess.

On my graduation trip to Miami, my buddy convinced me that smoking cigars was relatively safe, despite my propensity for lung-related issues, as I wouldn’t actually be inhaling the smoke. He was an idiot. The technique, as I best understood it, was not to inhale with the lungs, but to use the muscles in the mouth to draw the smoke in. The closest comparison would be the way you drink liquids through a straw, before swallowing. Ideally, smoke would stay out of the lungs using this method, and there wouldn’t be any issues. However, as a rookie, I didn’t have a firm grasp on the technique, and on my first try, a good amount went deep into my lungs. I coughed and hacked like an emphysema patient on their deathbed. After inhaling the smoke, I was full of nicotine, and the coughing fit sent blood rushing to my head. All of a sudden, I had a stomach ache, the spins, and I needed to take a dump. Luckily, I was outside with access to fresh air, and was able to move around which kept me from getting sick. I also located a public restroom, which was disgusting, but what I needed to avoid embarrassment. Everything ended up ok, but from then on, I made it a rule to only enjoy cigars outside.

During my freshman year of college, I began engaging in the age-old art of cigar appreciation a couple times per semester. Since I never had any issues, I believed more deeply that my parents were lying about the “asthma attack.” I enjoyed the cigars, but the lingering acridity was a put-off. It took a repeated cycle of brushing, flossing, and mouthwash just to be able to taste food again. Sure, the cigar itself was great, but the mouth maintenance required, and the complaints from my girlfriend were enough to put a damper on the fun. As a college student, there was plenty of fun to be had without doing a bunch of extra work. Due to the infrequency of my indulgence, I never quite perfected the technique, or got used to having the nicotine in my bloodstream. Oh yeah, I wasn’t an addict. I guess that’s good news. And the smoke never really bothered me as long as I stuck to the “outdoors only” rule.

By my senior year of college, I had a bit more experience, which I mistakenly let go to my head. A little misguided confidence can lead to suffering. One weekend, my college housemates and I asked our favorite advisor, Chaplain Tim Jones, to hang out. He suggested we go to a cigar store, offering a wealth of knowledge on his favorite vice. Chaplains in the south are the coolest. We drove down and met Tim at the redneck multiplex that was both humidor and cigar lounge. I was immediately nervous. This place was basically the Costco of tobacco products, and I felt like I was buzzing from merely looking at all the products. Tim helped me pick out a mild cigar that he thought I could handle as a novice, which put me at ease for the time being. His bunny slope turned out to be my black diamond. We paid for our cancer sticks, and stepped into the hermetically-sealed lounge.

I thought that a room dedicated to smoking would offer air purification, or at least some kind of ventilation. They may have had some hidden system in place, but none that I could identify. A thick haze of smoke clouded the entire room, as the simultaneously sharp and mellow smell of tobacco stung at my nostrils. I felt like a kielbasa in a curing room. I knew immediately that I wouldn’t survive an hour, maybe not even twenty minutes. If the Jigsaw killer wanted to torture me, this would be the place to do it. Despite my apprehension, the four of us sat down away from the other human smokestacks, and began creating a smog-like atmosphere of our own.

After about fifteen minutes of smoke and conversation, I was sweating. Not just a little mist, but full-on, nervous-breakdown-level buckets. The room was smelly, stuffy, smoky, and HOT. It was basically the perfect storm, and I was not interested in going down with the ship like George Clooney. I set down my barely-used cigar, and excused myself to the bathroom to see if I could recenter. I tried channeling my inner Buddha, but I was buzzing so hard it felt more like “nicotine drunk.” I was all over the place, walking too quickly, and my feet pounded the ground with enough force that I started fearing shin splints. Patrons of the store gave me odd looks as I darted through the aisles like a meth addict. I made it to the bathroom, closed the door behind me, and stood behind it like I’d just survived an encounter with Freddie or Jason. Maybe even both.

I sat down on the toilet with the hope that contact with the seat would cool me down faster. Yes, I was desperate. It was unbearably uncomfortable. I thought about texting my housemates to let them know I wasn’t feeling well, but decided against it, thinking this feeling would pass. I also didn’t want to look like I couldn’t hang. Ten, maybe twenty (what is time?) painful minutes later, I was feeling a little better and thought I might be coming down. I went back to the lounge, attempted to get my cigar lit again, and realized within seconds the improvement had been a figment of my imagination. I let the guys know I was done, and left the cigar lounge in search of fresh air.

I drunkenly stumbled out of the lounge, through the humidor, and into the larger warehouse store that encompassed the tobacco theme park I had escaped. I looked for the closest door and was disappointed to find that the sign above it said “Entrance Only.” There was no time: I wasn’t going to make it across the store to the door marked “Exit Only.” Luckily, there was a greeter standing at this door, and I asked him if I could have special permission to leave through this door. I was sweating, I was pale as a ghost, I looked like death was standing right behind me, but this man looked me up and down and said “No, you’ll have to leave through the exit.”

The hopelessness of the denial, and having to walk an additional eighty feet hit me all at once. With a sudden heave, every muscle in my body contracted and I lurched forward as I threw up violently. Multiple streams of stomach acid landed just one foot away from the greeter’s feet. Sweet relief! I took a couple seconds to gather myself, wipe whatever was around my mouth on my sleeve, and looked up at the greeter. He stared at me blankly as I said, “Sorry about that,” and turned toward the exit.

I still felt a little sick, but I was grinning inside. He didn’t help me in my time of need, so I didn’t make life easier on him. I really didn’t have a choice in the matter-- my body was ready to do whatever it wanted. Needed. I texted my housemates from a bench outside, letting them know I was waiting for them. I laid down on the bench and took deep long drags of fresh, smokeless air.

Twenty minutes later, they walked out unscathed, a testament to their Marlboro Man-level tolerances. Instead of saving face, I told them everything that had happened, including puking in front of the elderly greeter. The crew there must have cleaned it up already: my buddies were basically dying with laughter as they had no idea I was that intoxicated. They ribbed me for being a senior with the tolerance of a freshman, but were generous enough to get reservations at a local Mexican restaurant to help settle me down. After a few bites to eat, my body felt close enough to normal, and I felt completely fine by the end of the meal. I finally found my inner peace. At least, I think it was inner peace. I was just imagining returning to the scene of the crime with my overfilled stomach, and leaving another gift for the dear greeter. 

Maybe he’d finally let me exit through the “wrong” door.

Anyways, here’s my recipe for kielbasa.

Kielbasa+1.jpg

Kielbasa! This recipe will have you feeling as good as Ramsay Bolton after hanging out with Theon Greyjoy. It’s relatively healthy owing to the mounds of cabbage that accompany the smoky, salty treat that is polish sausage. Don’t get turned off by the cabbage: I usually hate the stuff, but this preparation works in a bunch of flavors that make it more than just palatable.

  • 1 Lb Kielbasa

  • 1 Yellow Onion

  • 1 Medium White Cabbage

  • 2 Tbsp Peanut Oil

  • ½ tsp Red Pepper Flakes

  • ½ tsp Salt

  • ½ tsp Ground Black Pepper

  • ½ tsp Ground Mustard

  • 1 Tbsp Whole Grain Mustard

  • 1 Tbsp Apple Cider Vinegar

Equipment:

You need something big enough to hold all of this stuff at the same time. A large saucepan, saute pan, saucier, skillet, or dutch oven will work. Part of the success of this recipe is how the flavors develop when all the ingredients play together. It’s like how sports are more exciting when teams play against each other, and it isn’t just one team on the field the whole time. That’s basically baseball. BORING!

  • Dutch Oven/Large Pan

  • Wooden Spoon

  • Chef’s Knife

  • Cutting Board

Active prep total: 30 minutes

Clean up: 8 minutes

You may think by only having a couple main ingredients, this is going to be a snoozer of a recipe. Well, you are in for a pleasant surprise. The cabbage and the kielbasa mesh together in a way that makes you wonder why we can’t achieve world peace. Ok, maybe it isn’t that revelatory, but it is a simple and delicious meal that should make anyone happy, unless you’re a vegetarian and are too busy being constantly depressed by the state of factory farming. Good for you and your moral standards, but you are missing out on flavor. 

Instructions:

Kielbasa+2.jpg
  1. This step is so easy, you could do it in your sleep. Set your Dutch Oven/Large Pan on the stove at medium heat. Add in 2 Tbsp Peanut Oil to warm up. Easy peasy.

    1. Now you have to wake up. While your pan is heating, cut your kielbasa into ½ inch thick pieces. Add your little army of meat discs to the pan. Listen to them sizzle! The goal is to brown these up on both sides. Leave them cooking on one side for about 3-4 minutes, then flip them to evenly roast both sides. It’s the same method as achieving the ideal beach tan.

  2. Flay your onion like Ramsay Bolton would (take the outer skin off). Finely chop it into tiny little pieces, also like Ramsay Bolton. This dude was seriously born in the wrong era. He’d be a great Gordon Ramsay. Wait…

  3. When the sausage is brown on both sides, add the onions to the party. This is also when you should add ½ tsp Red Pepper Flakes, ½ tsp Salt, ½ tsp Ground Black Pepper, and ½ tsp Ground Mustard. Mix it all around to get a good coverage of spices on everything. Pretty soon, you’ll be salivating like a hunting dog on a hog trail.

  4. While your onion softens and adds its flavors to the sausage, it is time to chop up the cabbage. You’ll want to avoid using the heart, which is the thick white part that runs from the bottom up through the center. This can be removed out by cutting the cabbage in half, and then in half again. Simply cut away the heart attached to each quarter. Finally, chop each quarter into 1.5 inch strips, then rotate 90 degrees and cut at the same intervals again. These are the perfect bite size pieces for your dish. I know what you’re thinking: “They still taste like cabbage!” True. Dump this mass of rabbit food into the pan with your oils, spices, and aromatics. You are almost there.

  5. After adding the cabbage, use your wooden spoon to stir everything up to get an even distribution. Continue stirring a couple times per minute for the next ten minutes. This will be enough time for the cabbage to become tender, and most importantly, absorb the flavors and smells so it doesn’t taste like cabbage anymore! 

    1. Pro tip! There may be some browning on the bottom of the pan, known as “fond” because it is full of the flavor you care about. Adding a couple tablespoons of water can help release it from the pan, and infuse it with the food. This will make it taste better. Duh.

  6. When the cabbage is tender, remove the pan from heat, then add in the 1 Tbsp Whole Grain Mustard and 1 Tbsp Apple Cider Vinegar. Give everything one final stir before getting your bib ready.

Oh man. The combination of cabbage, spices, and sausage should be filling your kitchen and nose with smells that make you feel perfectly at home. This is the kind of food you want when you are overdosing on nicotine, but is much more enjoyable when you aren’t. The aroma, the flavor, and the soft crunch will distract you from your ideations of revenge. You won’t even think about returning to that cigar store to show the greeter what you are really capable of. You will be perfectly happy just to sit back, and enjoy the smoke-free environment of your home.

Unless you burned the food. That’s on you.

Join me next week for more Meals and Misfortune.

(Or, check out last week’s delicious disaster!)

Kielbasa+6.jpg

Voted Off The Island

I had a rough time with my self esteem in middle school. I know, real original.

After completing sixth grade, the two elementary schools in our town fed into the same middle school. A lot changed. Rather than continuing with the elementary school model of having one downtrodden teacher for core subjects and specialists just for music, art, and PE, middle school introduced specialized teachers for every single subject. In this new world, math, english, social studies/history, and english were each taught by a different downtrodden teacher. Additionally, since one english teacher wasn’t able to teach an entire grade, students were split into three “teams,” delineated by color. Each “team” lived in its own ecosystem, meaning they had different core teachers and different electives. The teams were even separated geographically; the “Yellow” team had classrooms near the gym; the “Purple” team had classrooms near the woodshop; the “Red” team had classrooms near the library.

One of my best friends was put on a different team, which meant I effectively never saw him in school. It was like being best friends with a ghost, or having “a girlfriend from summer camp that goes to a different school.” Sure. Everyone believes you. My other closest friend opted out of our dingy “Junior High” by leaving the public school system to join the ranks of private education. In the absence of my day-one buds, I had to find new friends in my designated team. If my younger, sheltered mind had to imagine prison, this was basically it. After spending my entire childhood with mostly the same people, it was a real shakeup for my social life. I was back to being the new guy, even though I’d been in the same town forever. Adding in my insanely long and curly hair, I felt like Napoleon Dynamite in more ways than one.

The lack of friends was hard enough, not to mention the hormones associated with becoming a teenager, my family moving across town, and the painful realization that I wasn’t an athlete. I was never the best at sports, but it hurt to see that I couldn’t even add value to a flag football team, or make friends on the sidelines as I’d done in the past. My dugout pranks and inventive cheers weren’t enough to get on base, let alone cross the plate. I always prided myself on being book smart, but my lack of confidence led to bad grades, arguing with teachers, and generally not being friendly to those around me. In my mind, I was Good Will Hunting, but in practice, I was Sid living next door to Woody, Buzz, and Andy. I was pretty down on myself, but luckily there were some people who thought it was worth getting through my crusty exterior to find the molten excitement of my true friendship inside. The friends I made during those tough times are still some of my closest friends to this day, but amongst the majority of my peers, I gathered a reputation for being a jerk. There were plenty of people who did not like my brand, and I can’t say I blame them: If I had met my own clone, I would’ve had plenty of insults to sling his way.

By the time eighth grade rolled around, social circles had solidified. I had managed to make a few friends, but I was not an outwardly kind or well liked person: I didn’t get called to hang out or go to parties, and I didn’t have much talent outside of making fun of people (which, to be clear, I was great at). I still had some friends that knew I was hurting deep down, but my general demeanor turned people off, alienated classmates I could have otherwise been friends with, and created a feedback loop that led to me becoming even more unfriendly and unpopular. This became all too clear in math class.

Pre-algebra generally started right after lunch. I would eat my roast beef sandwich with anyone that would sit with me, then head to class. Our teacher, Ms. Beech, also took lunch at the same time, and usually found her way to class a few minutes after the period had technically started. She had little control over the class even when she was in the room, but it might as well have been The Hunger Games when she wasn’t around. The ringleader of pandemonium, Reggie, would enter the teacherless room, grab a piece of chalk, and write “Survivor” on the blackboard. He then hosted his version of the hit reality show where he would get the students to vote off the least popular kids in the class. There were no real consequences, other than knowing everyone hated you. This happened at least ten times, and my name was always an option. I was very frequently “voted off,” and my life would have improved if Jeff Probst just let me leave.

Unsurprisingly, I did not take it well. I would Hulk out, turning red-in-the-face angry, and say even more awful things to people than usual. Eventually I pointed my criticisms at Ms. Beech. Reggie, who knew he could get in trouble if he was caught in the act, played teacher’s pet to avoid scrutiny. Ms. Beech never saw the full proceedings, and assumed I was simply bad mouthing Reggie because that’s what I was known for-- not because he was actively bullying me and other kids in the class. Being young, dumb, and emotional, I was unable to pull myself out of this pattern to any positive effect.

My behavior got worse and worse, and it wasn’t until I had gone way too far that I realized how my actions were affecting others. In hindsight, Ms. Beech was only in her second or third year of teaching, and in all likelihood lacked the experience to understand what was really going on in her class. Teachers, specifically middle school ones, are saints and deal with an unimaginable amount of shit. It's not surprising that this 20-something had enough on her plate trying to teach basic math to half a hundred hormonal monsters without having to be their therapist/moral compass as well. One day, I pointed out a mistake she had made on the blackboard, an incident which I absolutely relished. The correction was valid, but my tone was intended to bite. My words clearly upset her: she turned red in the face, and the situation quickly escalated into a verbal spat. She went off on me for being mean and a bad student, and I rifled back with disparaging remarks about her math ability, her teaching skills, and her alma mater, which brought her to tears as she left the classroom.

At that moment, I felt amazing. I was used to feeling powerless, but had somehow “successfully” eviscerated my teacher. For once, I had power, or at least some control over my life. I felt like David having just defeated Goliath in single combat. Only, I hadn’t saved an entire army. My “victory” was turning everyone in the room against me.

A moment later, I realized I wasn’t the good guy at all, but the twisted villain. I was using warped self pity to justify attacking people who didn’t deserve it. I felt awful about being made fun of, for being put down by my classmates, and used that as fuel to do the same thing to someone else. I used my pain to vote her off the island, and made her feel the same “lesser than” that I felt. I walked out to the hallway to apologize, but failed to say anything that made up for the words I had used to tear her down. It felt terrible. I was powerless in a whole new way, and I was responsible for it all. Cersei Lannister and I could have started a “digging your own grave” club.

I would love to tell you things immediately got better, but they didn’t. Ms. Beech and I never came to an understanding, Reggie continued Survivor, and I kept verbally abusing other people. It took me years to figure out why I kept going through the cycle of being bullied and feeling awful, then taking it out on others only to feel awful again. I don’t wish anyone else to go through this, but I am thankful to have eventually learned from my mistakes and now know how to treat people better. If you notice this pattern in yourself, please take some time to reflect on your behavior, and learn about emotions and belief systems. Consider seeing a trained professional who can help you better understand your thoughts and feelings.  Your life will improve remarkably, and you may even keep yourself, and anyone else, from being voted off the island.

Anyways, here is my recipe for a roast beef sandwich.

RB3.jpg

Ingredients:

This was my go-to midday respite in middle school. I always felt just a bit better after having my medium rare ray of sunlight, beaming through two pieces of bread. Then I would eat that sunlight and become a medium rare being of enlightenment. Be forewarned: It only lasted 12-18 minutes, and then I would return to my regular, urchin-like self. But those 12 minutes…!

  • ¼ Pound Deli Sliced Roast Beef

  • 1 Baguette (you can use any bread)

  • 2 Slices Monterey Jack Cheese

  • 1 Leaf Lettuce

  • 5 White Mushrooms

  • ½ Sweet Onion

  • Horseradish Spread

  • Butter

Equipment:

All you really need is a tiny bit of willpower. The only thing that takes effort is cooking the mushrooms and onions, and then practicing just a bit of self control as the smells begin to make your house smell like heaven.

  • Frying pan

  • Bread knife

Active prep total: 12 minutes

Clean up: 8 minutes

You deserve a break. This sandwich is your little vacation. Commuting to the same room every day, sitting at the same desk, and talking to the same people over and over can make you crazy. Take a minute to sit back, relax, give your thought processes a break, and let your enjoyment cortex take over. You earned it.

RB6.jpg

 Instructions:

  1. Start by chopping your ½ sweet onion and slice your 5 mushrooms. Throw a slice of butter in the frying pan at medium heat, then add your veggies to the hot pan. Add a little salt and garlic powder. LEARN HOW TO USE SPICES! Let them sit for a bit, then mix it around and let them sit again. Continue this process for a few minutes until they have completely browned. 

  2. While the veggies cook, prepare the rest of the sandwich. Cut an 8 inch section of baguette, and then cut it the long way to create your sandwich bread. Layer the bottom piece with ¼ pound of roast beef, and add the cheese on top. Spread horseradish sauce on the top piece of bread, and use it as glue to stick the lettuce on there. A lot of people don’t realize, horseradish keeps everything together, like that one friend who starts the group chat for dinner plans. Horseradish friends are the real MVPs.

  3. When the veggies are browned, add them to the bottom half of the sandwich, on top of the cheese. This will melt the Monterey Jack into the sliced meat, and bring the whole sandwich together. Wait, is Monterey Jack the new horseradish friend? It’s ok, there can be more than one.

All that’s left is to carefully place the top piece of bread, completing your heavenly hoagie. Remember, in sandwiches and in life, simplicity is key. A lot of times, I would overthink situations, making them worse. Don’t fall for the sandwich with 25 ingredients, topped with spicy truffle aioli, served on a fajita platter. IT’S TOO MUCH. It’s sensory overload. Growing up, I was in a constant state of reaction and escalation, and couldn’t slow down to let my rational brain take over. If I had, I would have seen how much I was getting in my own way, and taking out my insecurities on other people. Take the time to give yourself a break. Right now especially, we all need it. I want to thank Ms. Beech (and all my teachers over the years) for putting up with myself and other students that didn’t deserve or appreciate your patience. And to all the kids going through some version of what I went through, I promise you, it will get better. Roast beef is only the first step on a long journey to enlightenment. Please, reach out to the people in your life who you trust, and who love you. There are a lot of resources out there to help with bullying, depression, and anger. There is a path to a better life, and these resources can help. Making teachers cry is not the solution. Trust me.

Join me next week for more Meals and Misfortune.

(Or, check out last week’s delicious disaster!)

RB1.jpg

The Sun Will Come Out Tomorrow

In my Junior year of High School, the theater department put on a production of Annie. I didn’t get to see the whole thing.

I had planned on seeing the Saturday matinee performance with my girlfriend at the time, Janet. My mom was out of town visiting a cousin, so my dad was in charge of the house. This did not happen very often, and he wanted to impress us while Mom was away. His first act was to make blueberry pancakes for my siblings and me on Saturday morning. They were pretty delicious, and it was a great start to a hopefully phenomenal weekend. Those good vibes lasted less than 12 hours.

Since the show was at 1:00pm, I played video games until about noon, then started getting ready. As I slid on my ripped American Eagle jeans, my stomach began to feel a little uneasy. It wasn’t my juvenile fashion sense that upset me; I thought it might be those “wonderful” pancakes. After inquiring about similar issues amongst my siblings and father, and finding that they felt totally fine, I powered through and decided to attend the show.

In the car, my stomach gurgled with intensity. I let loose a lot of gas on the ride over, and I naively hoped that might be the extent of my troubles. There wasn’t any pain, so panic had yet to set in. After mentally preparing to hold it in for a couple hours, I pulled up to the parking lot and met up with Janet. As we walked in together, I was already feeling much worse. 

We took our seats, the lights went down, and I knew I was done for. It took excessive focus to keep everything inside of me, and sweat started to collect on my brow. I don’t remember any of the play. I sat in agony for 20 minutes before excusing myself to the bathroom. Despite the walk taking less than 30 seconds, I didn’t make it: a squirt of brown shot out of me and into my pants. Despite the nightmare unfolding around and inside me, I vowed not to let it get worse before I was over a toilet. I kept that promise, but the damage was done. The less than solid nature of my excrement had seeped through my tighty whities, and was clearly visible on my stylish jeans.

I contemplated staying there forever (eventually someone would get suspicious and come looking), considered texting for help (and ruin my relationship), and then finally decided to make a run for it. I couldn’t go back after shitting my pants: the auditorium was filled with all my classmates, my friends, and especially Janet. I imagined the pain of embarrassment would be worse than dental torture. I found the nearest door which led outside and bolted through, then beelined for the car. I texted Janet that I had already left, and that she should stay to watch the rest of the show. It felt like the right thing to do, but I honestly didn’t even look at her reply: I needed to get to the safety of my house.

I made it home without further incident, threw my clothes in the wash, and decided to hop in the shower-- something that usually helps me feel better. Not this time. The hot water was the opposite of soothing, and instead made me feel gross. The gurgling took on a more sinister sound, and the cramping pains kicked me from my neck to my belt. I finally let loose a heave so hard it forced me to bend over. The next visual is permanently seared in my brain: my feet straddling the grate in the bottom of the shower, now covered by the distinct combination of blueberries, pancakes, and stomach acid, slowly spiraling into the drain.

I felt better immediately. There’s no way I can put this up in the win column, but I avoided the agony of embarrassing myself in front of my peers, and most importantly, Janet. I crawled into bed and slept for the rest of the day, hoping the sun would come out tomorrow.

Anyways, here is my recipe for blueberry pancakes.

BP2.jpg

Ingredients:

Pancakes are one of my all time favorites. Sure, waffles have the perfect crevices for syrup, but pancakes will soak it in like a sponge! I get so excited every time I eat these little golden discs of heaven, I try to eat as many as possible. But, that doesn’t mean you should make them smaller: you just have to eat MORE! Oh, maybe that's how I got sick.

  • 1 Cup Milk

  • 1 Large Egg

  • 3 Tbsp Vegetable Oil

  • 1 tsp Vanilla Extract

  • 1 Cup Flour

  • 1 Tbsp Baking Powder

  • 1 Tbsp Sugar

  • 1 tsp Cinnamon

  • Non stick spray

  • ½ Pint Blueberries

  • Maple Syrup

  • Butter

Equipment:

Any kind of stovetop pan will do the trick. There is a beauty in the utility of pancake batter, and the fact that it will make great pancakes on many surfaces. Use the hood of your car if it’s hot enough! Actually, don’t: That might damage the paint job.

  • 1 Large Bowl

  • 1 Medium Bowl

  • Whisk

  • Stovetop Pan (or griddle)

  • Spatula

Active prep total: 20 minutes

Clean up: 8 minutes

I used to be afraid of making anything with flour in it. I would see a recipe that wanted the raw, white powder and think, “That sounds like a lot of effort.” Let me put you at ease. These are easy to make. Pancakes are a simple joy, and even I, a simpleton, am capable of making perfectly satisfying, delicious, fluffy cakes. Please let that confidence seep in.

BP6.jpg

 Instructions:

  1. Combine the dry ingredients (1 Cup Flour, 1 Tbsp Baking Powder, 1 Tbsp Sugar, 1 tsp Cinnamon) in the medium bowl. Whisk it around well for about a minute, as this will disperse the baking soda in the mixture. In my youth, I bit into a pocket of baking soda that had clumped together while making the batter. That bitter, metallic taste is with me to this day. It’s the taste equivalent of nails on a chalkboard. Gross.

  2. Combine the wet ingredients (1 Cup Milk, 1 Large Egg, 3 Tbsp Vegetable Oil, 1 tsp Vanilla Extract) in the large bowl. Enjoy watching the vanilla extract interacting with the other liquids (an almost hypnotic dance), then snap out of it! Whisk until homogenous.

  3. Slowly add the dry ingredients and get them incorporated with the wet. When they are all combined, you will have a nice thick batter. Add your blueberries and give it one more good mixing. Time to get excited!

  4. Turn the dial on your stovetop pan to one click above medium. The pancakes I made were about ¼ cup of batter each. Spray your pan with Pam (or other cooking spray), then pour in your batter, and watch it take the iconic circular shape. When bubbles begin to form toward the middle of the batter puddle, it’s time to flip! Give it another 30 to 60 seconds on the uncooked side, and then take it off the heat.

  5. Repeat until you are all out of batter. Let the great smells of pancakes and blueberries fill your head and heart. And then, let them fill your belly.

Time to build up this stack of cakes, add some butter and syrup, and then turn into a one-man demolition team as you tear down your pancake skyscraper. Sometimes, we build up our bad memories to be bigger than they really were, but we can tear down the power they have over us. See? Pancakes are the perfect metaphor for improving your life. As you go through your past, you’ll realize it may actually be sweeter than you remember. If not, try adding more blueberries.

Join me next week for more Meals and Misfortune.

(Or, check out last week’s delicious disaster!)

BP8.jpg

Shirt Ripping Guilt

My memory of preschool is pretty cloudy, but what I can remember tells me it was spectacular. We had nap time, reading time, arts and crafts, and recess (which lasted all day). I remember painting with a smock, playing in the sandbox, learning the words to “Baby Bumblebee,” and a host of other core experiences essential for a young child. It was a fantastic place to learn, but there was one thing that could ruin my day.

My teacher, Mrs. Johnson, was one of the nicest people ever. When I got into trouble, she would give me life lessons before sticking my nose in a corner, and was very patient with the number of times I needed to be “taught” something before I “learned” it. However, I never saw myself as deserving of punishment and would get very upset even when I was responsible for any wrongdoing. I have trouble remembering all the times Mrs. Johnson raised her voice at me, but I often found myself in timeout.

Despite the frequency of my transgressions, I didn’t really slow down, nor did I get used to the guilt and sadness of being disciplined. Instead, I tried to avoid being punished by hiding the broken toys, lying about the mean things I said, or pushing the blame onto someone else entirely. Most of the time, my misdeeds were discovered anyways, but even when I “got away with it,” I was left with a feeling of immense guilt. I would like to chalk this behavior up to “being a kid,” but the truth is that the other kids in my school were kind. They understood that their actions had consequences. They knew that when bad things happened, they could learn from them and then avoid doing them in the future. They were thinking about others: I was just a selfish numbskull.

Which leads us to the very first bad thing I remember doing to someone else. It was a normal preschool day in 1996, and my class was preparing for arts and crafts after lunch. Filled with a wonderful PB&J sandwich, I sat down at the table next to my buddy Ken, and started using the small metal scissors to cut strips of newspaper. It was paper mâché day, and we were tasked with making replicas of ourselves. Creating a paper clone seems like it could be pretty trippy for a four year old, but I was genuinely excited. I had been dreaming of this all week, hoping magic would somehow infuse my inanimate twin with a soul. I imagined that if I made it look exactly like me and dressed it in my clothes, it would actually spring into action like some demented childhood Frosty the Snowman. Honestly, it still sounds pretty cool.

I didn’t make it very far. While cutting the many strips of paper, my overexcited brain stopped paying attention to the activity in front of me, and my hands went on a quite erratic autopilot. Somehow, I maneuvered the scissors in such a way that I ripped a hole in my own shirt. At first, the hole was almost imperceptible–I could probably have worn the shirt for weeks without anyone noticing. But, being an irritating child, I played with it until the hole soon became impossible to ignore. By the time Mrs. Johnson noticed, half of my torso was exposed. I was in trouble.

An MRI would show that my brain activity was off the charts trying to calculate the punishment and consequences of my actions. I came to the conclusion that the only way out was to blame someone else. I was led into the “interrogation room” to determine the cause of my destroyed clothing, ready to present my fake explanation. Through tears, I told my teacher that Ken, who I had been sitting next to, was jealous of my “cool” shirt, and cut it. When he realized it wasn’t noticeable, he tore it. Wow. I was awful. Mrs. Johnson went out to get Ken, and sat us side by side. From the look on his face, she had already scolded him as well. I was completely guilt-ridden. Given the chance to tell the truth, I admitted that I had cut my own shirt, and that I was the worst person in the world for blaming my friend.

I don’t even remember being put in timeout, or my parents punishing me for it. What I do remember is how guilty I felt for the way I blamed Ken, who had nothing to do with it, and that our friendship never recovered. More than twenty years later, I still remember this lesson. Mrs. Johnson, thanks for talking things through. And Ken, I’m still sorry for throwing you (wrongfully) under the bus.

Anyways, here is my recipe for a PB&J.

PB1.jpg

Ingredients:

Ok, I get it. You already know how to make a PB&J. That's great! Here’s my way of doing it, which is probably close to, but not exactly the same, as your way. Maybe, just maybe, there is still something to learn. Yeesh. 

  • 2 slices Whole Wheat Bread

  • 1 Jar Strawberry Jam

  • 1 Jar Skippy Peanut Butter

Equipment:

The good news is, you have everything you need! Isn’t this a nice change of pace, rather than whipping cream in a stand mixer, or using eleven bowls to make one pizza, or… enough! Just a nice, relaxing, nostalgic PB&J. You’re welcome.

  • Plate

  • Spoon

Active prep total: 5 minutes

Clean up: 5 minutes

Remember, take this one slow. It still won’t take much time, but how you do anything is how you do everything. You are about to combine peanut butter and jelly in holy matrimony in such a way that your mouth will go to heaven. Did you forget? Well then here’s a delicious reminder.

PB2.jpg

Instructions:

  1. Get two slices of bread and place them on a plate. Come on, you knew that.

  2. Get a heaping spoonful of peanut butter out of the jar, and spread it on the face of one slice of bread so that you can’t see any of the airy texture. This ensures you are getting enough peanut butter in each bite.

  3. Get a heaping spoonful of jelly out of the jar, and spread it on the face of the other slice of bread. The ratio of peanut butter to jelly is important, and much experimentation will reveal that you want just a bit more jelly than peanut butter to help deal with the peanut butter stickiness. If your ratio is on point, you won’t even need a glass of milk to wash it down. I may be an idiot, but I’m a scientific idiot.

  4. Close your eyes, and take a deep breath. Remember what it was like to put your book bag in a cubby, to sit at a low table in a tiny chair, to listen to a guest reader while “criss cross applesauce.” This PB&J is about to take you back to school.

  5. Open your eyes. Open your eyes. I think you get it.

This is the perfect combination. The bread feels like home, the peanut butter reminds you of sitting on the playground, and the jelly comes in and washes away the stickiness of your terrible childhood decisions. It’s not only a perfect food in its simplicity, but in the lessons it teaches us about how to move on with our lives. We can only dwell on the excess peanut butter for so long, but eventually it's time to wash your hands. Or, if you didn’t understand the metaphor, move on. It’s time to forgive your actions from two decades ago, and maybe ask Ken if that’s why you stopped being friends. Maybe it was all the trash-talking you did to him in elementary school. Whatever it may be, learn what you can, and try to do better in the future. That’s what jelly would want.

Join me next week for more Meals and Misfortune.

(Or, check out last week’s delicious disaster!)

PB3.jpg

Pants Off Embarrassment

What would you do for a chocolate-coated ice cream novelty?

Where I grew up, we played in the woods on a daily basis. Ticks were a huge concern due to the number of diseases they can carry, particularly Lyme. To protect ourselves, we would perform “tick checks” whenever returning from spending time outdoors. We combed through each other’s hair like chimps, seeking tiny stowaways, getting excited when we found freckles, moles, and infrequently, an actual tick. Yuck.

There was an improvised path through the woods behind our house that ran parallel to the road, crossed through our neighbors’ backyards, and landed in an offshoot neighborhood from our own. There were many points of interest to stop and look at along the way: finding a discarded toy or abandoned tree house here and there. When I made these discoveries, I felt like the world’s greatest archaeologist. We would often excavate around fallen trees to find bugs and salamanders, catching a couple critters for observation and then letting them go after much visual scrutiny. We were Indiana Jones and Bill Nye, all at the same time. I want to see that movie. Sony? Paramount? Call me.

One day, after a forest excursion, my brother and I came indoors and started the tick checks. Usually after a thorough inspection of our scalps, we would give each other the clean bill of health, then move on to step two. I would hop in the shower, cleaning off the forest grime and searching the rest of my epidermis for tiny, insectile vampires. While we had done this a hundred times before, occasionally finding a tick on my arm or leg, this day was unfortunately much different. 

I was doing my best to clean every part of my body when I felt a small anomaly in a place I had never felt one before. Now, I am not able to see this particular area of my body, but I had touched it for cleaning purposes and knew what to expect. Only for cleaning purposes. I promise. Today, there seemed to be a skin tag where just yesterday there hadn’t been. Realizing skin tags take a bit longer to form than just a day, I Occam’s razored to the only conclusion possible: Taint tick. 

Stepping out of the shower, I was filled with dread. How would I manage to exorcise this invisible demon? I’m sure I didn’t consider as many ideas as I should have before asking my parents. The embarrassment was so strong that I had trouble telling them about my downstairs situation. They slowly coaxed out the details of my anxiety, and tried hard not to laugh at my predicament. I remember that helping for a bit, but my positive attitude disappeared once seated in the operating room. My porcelain gurney and familial surgeons were less than inviting, and at first I refused to “drop trou” and accept their help. In this moment of difficulty, my mom proposed the Great Compromise of 2000. Should I accept the help of my parents at the cost of my embarrassment, they would reward me with a chocolate-coated ice cream novelty.

After some teetering, I relented. I pulled my pants down, pulled other things up, and showed my parents my tick. After even more waffling, I let my dad tweeze this penile pest from my underside, and got out of there with my face redder than the devil. I went downstairs to the freezer to grab my hard-earned reward, and enjoyed that sweet chocolate-vanilla combination with the embarrassment of the past behind me. From that day forward, I stopped being quite so embarrassed about the problems in my life. I had achieved big tick energy.

Anyways, here’s my recipe for a chocolate-coated ice cream novelty.

IMG_9059.jpg

Ingredients:

You will need to start by making ice cream, which I taught you last week. Well that’s good, because I am not teaching you again. What? You really need me to say it all over? This generation is so… Ok, fine. I will tell you again but seriously you should have learned it the first time. Way to go. Jerk.

Ice Cream

  • 1 pint (2 cups) Heavy Cream

  • 14 oz can Sweetened Condensed Milk

  • 1 tablespoon Vanilla

Chocolate Coating

  • 8 oz semi sweet chocolate morsels

  • 3 oz refined coconut oil (has less flavor than 

Equipment:

Guess what! I never have exactly the right tools. I don’t know if that inspires you, but it should. You will be able to do this with something in your house. I don’t recommend drinking your own bodily fluids, but Bear Grylls said it best: “Improvise, adapt, come over and eat some ice cream.” I think that’s what he said, but I don’t know. I’m not a journalist.

  • Standing Mixer/Bowl

  • Second large bowl

  • Spatula

  • Freezable square or rectangular container (not glass, something with good corners. I used 2 rectangular bread molds, but a 9”X9” pan is ideal)

  • Square container (chocolate coating tub)

  • Small pot

  • Cutting board

  • Chef’s knife (or other non serrated knife)

  • Freezable Pan

  • Fork

  • Parchment Paper

  • Spoon (Optional)

Active prep total: 35 minutes

FREEZE time: 8+ hours

Clean up: 15 minutes

There comes a time in every person’s life where they need to decide if they’re willing to put in the effort to make it to the big leagues. This is that moment. This recipe takes a little elbow grease, finesse, and time management. Put it all together, and you just may make one of the best desserts of your life. 

Instructions:

  1. We are starting by making “ice cream.” This isn’t exactly ice cream, but is a perfectly delicious substitute with the correct consistency for this treat. Pour 1 pint of COLD heavy cream into the bowl of your standing mixer. Whip it on a high setting, around 75% of your mixer’s top speed. On my mixer, there is a convenient setting called “whipped cream,” which is the 9th notch out of 12. The speed should almost scare you, but not quite.

  2. As the cream whips, you will notice it firming up to a stage of “soft peaks,” meaning it is capable of holding shape on its own, but still flops a little. I recommend whipping until “stiff peaks,” meaning the cream will hold whatever shape you give it, but BE CAREFUL. It takes very little time to go from soft to stiff peaks, and you can “over whip” the cream, at which point it will lose shape. I will not make jokes about soft and stiff peaks. I know you are already doing that.

    1. If you do over whip your cream, pour in 3 or more tablespoons of heavy cream, and whip again. Make sure to watch it closely!

  3. In your second large bowl, use your spatula to combine the can of sweetened condensed milk, and a tablespoon of vanilla extract. Now comes the tough part.

  4. Add your whipped cream on top of the mixture of vanilla and condensed milk. You have to slowly “fold” the mixture into the whipped cream, mixing in but not breaking the structure of the whipped cream. Remember what you learned from Arthur the aardvark: “Tis a gentle hand ‘twil rule the land.” Arthur should have been a GOAT.

  5. Lay parchment paper in the bottom and sides of your freezable container, then transfer the cream into your container. You want the ice cream height to be between 1 to 2 inches, as this will be the relative thickness of the final treat. You could make them thicker, but remember the chocolate coating will also add thiccness. That is spelled correctly.

  6. This will need to freeze overnight (8+ hours). The ice cream will have to be dunked in molten chocolate, which would be an unmitigated disaster if the ice cream isn’t completely frozen. If it isn’t cold enough, put it back in the freezer, or call Elsa.

  7. Assuming you’ve frozen your ice cream for the requisite amount of time, pull it out and move the ice cream to a cutting surface. Leave the parchment paper in the container! Quickly cut the ice cream into squares around 4-5 inches on any side, return them to the container, and then place it back in the freezer. You can also put your freezable pan in the freezer to precool, which will help keep your final product from melting.

  8. Now it is time to make your chocolate coating! On LOW heat, melt 8 ounces of semi sweet chocolate in the small pot for about 5 minutes until smooth. Next, add in your 3 ounces of refined coconut oil, and stir into a glossy ocean of deliciousness.

  9. Time to set up your workspace. You will want to be able to move the ice cream squares from the container to the chocolate bath and finally to the frozen pan. 

    1. First, set out the frozen pan and cover the bottom with parchment paper. I had this on my right side.

    2. Get out your square shaped chocolate tub, and pour the smooth chocolate ocean from the pot into the dunking vessel. I had this directly in front of me. DO NOT overfill the container of chocolate. If you do, dunking the ice cream in will cause the container to overflow. It would be a regrettably delicious disaster.

    3. Retrieve the ice cream squares from the freezer, and place them to the left of the chocolate tub. The order from left to right should be ice cream squares, chocolate tub, chilled pan.

  10. Now for the fun part. Make sure you aren’t wearing your favorite NASA sweatshirt, and get out a fork. Use your fork to lift (from the bottom) a block of ice cream from the container and into the chocolate. The ice cream will be less dense than the chocolate and will naturally want to float on the surface. Use your fork to push the top down, then release, allowing chocolate to cover the entirety of the ice cream. This will create a beautiful chocolate shell. Use your fork to lift the chocolate covered ice cream (from the bottom) out of the chocolate bath and onto the parchment lined cold pan.

  11. Repeat step 10 until all your ice cream blocks are coated in chocolate. If at any point the ice cream gets too soft, return it to the freezer. Likewise, if the chocolate becomes too hard, it can be heated to melt again. It may get more difficult to dunk the ice cream as the chocolate is used up and the level recedes, so have a spoon ready to assist in drizzling over the uncovered areas.

  12. Once they are all coated, place the whole tray in the freezer for thirty or more minutes. After that, the ice cream will be cold, and the chocolate shell will have set. Time to bring them out, and enjoy!

Wow. Would you believe you could make something this good at home? The nostalgia factor is huge, and brings me back to happier days of my youth in every crunchy, ice cream filled bite. As an improvement, these did not fall apart as easily as the store bought ones. Even better than that, I didn’t have to suffer through pants off embarrassment to eat them! The worst part of this is just waiting for ice cream to freeze. These days, that’s as much as I’m willing to suffer through for a chocolate-coated ice cream novelty. 

We’ll see how long that lasts.

Join me next week for more Meals and Misfortune.

(Or, check out last week’s delicious disaster!)

IMG_9091.jpg

Simpler Times Sundae

Growing up, I spent a lot of time at the beach. And around the beach. And at my house near the beach. And at my friends’ houses near the beach. Beach.

During summer vacations, my buddy, Tom, (best man at his wedding, no big deal) would invite me over to his family’s vacation home to bike, canoe, and swim around a little beach town near where we grew up. Our favorite thing to do was make massive ice cream amalgamations after a long day of beaching. After all, there are no ice cream rules in the summer. On one such day, Tom and I had spent every hour outside. We took our bikes to the marina, went swimming at the beach, played fetch with his dog, tried to catch a seagull, and finally came inside when we realized we were close to sun poisoning.

Tom’s vacation house was awesome. It had a sweet living room, giant bedrooms, lofts, and huge decks; The kind of place a Vanderbilt would barely find comfortable. A home with character that was just a little old, in the all-the-floorboards-creak kind of way. It was more charming than dysfunctional, but its age would turn out to be a deadly flaw.

Despite being in an affluent town, there were no public facilities. People were too stuck up to let you come in to use the throne; they didn’t want your sandy feet on the floor of their million dollar mansion. Throughout the day we would just pee in the ocean or behind some bushes, but for heavier payloads, we had to hold it in. For hours. On this fateful afternoon, we made it back to this old house, just in time to drop bombs. 

And I did. I won’t get into details, except to say what was in the toilet resembled a diseased eggplant in color, shape and size. I have been afraid of toilet clogs since my first one in fourth grade. I have used courtesy flushes many times in my life, but this time, staring down the barrel of a twelve gauge shitgun, that would have had no effect. Now I looked at my twisted creation, weighing the options I came up with: hope for the best and flush, throw this thing out the window, or waffle stomp it through the shower drain.

I should have been more bold. I talked myself out of the more extreme options, convinced myself I was just being paranoid, and crossed my fingers. I had forgotten the cardinal rule: old house = imperfect plumbing. As I pressed that silver lever, I found I was silently repeating the Lord’s Prayer for the first time in my life. But the gods abandoned me, and the water level in the bowl started to rise. I prayed again, hoping the pressure of another flush would force it down. I flushed again. And again. And then once more, this time standing in a quarter inch of toxic waste. 

My worst fear came to life, and the embarrassment I imagined couldn’t live up to the real thing. This was an end of days scenario. I fantasized that the underworld would split the earth in two and swallow the whole house at once. Eternity in hell seemed like a lesser punishment than what I would go through. Or, at the very least, I would be dead before I had to stand trial for my plumbing sin. I didn’t know what to do, other than to secretly call my own parents to see if they could drive over and bail me out. Tom’s whole family was downstairs and had no idea that in a few minutes their world would be turned upside down.

I finally turned the water to the toilet off, tried to use toilet paper and disinfectant to clean up the floor as well as I could, then went downstairs to face the music. 

Somewhere in that descent, I blacked out. The body has a way of forgetting trauma so that you don’t have to relive it over and over. The next thing I knew, my dad was there to size up the problem. He grabbed a bucket and began carrying my shit water down the stairs, a few pints at a time, through the living room, and out the back door. Four times at first. Then, once the bowl had filled up again, another four times. After forty five more minutes of excruciating excrement embarrassment, the clog gave way, and the water started to recede on its own. Thank Shit Christ. I don’t think I have ever been more relieved.

It took me months to recover. I couldn’t look anyone in Tom’s family, or anyone else, in the eyes. Eyes are the window to the soul, and my soul was tarnished. 

Anyways, here’s my recipe for an Ice Cream Sundae.

Sundae+Image+1.jpg

Ingredients:

I didn’t want to make this too easy on you. Some people see the word “sundae” and think, “Oh, this is more of an assembly job.” Bad news buddy. You’re about to learn how to make ice cream. Then you can make the sundae. Wait... that isn’t bad news!

Ice Cream

  • 1 pint (2 cups) Heavy Cream

  • 14 oz can Sweetened Condensed Milk

  • 1 tablespoon Vanilla

Accessories

  • M&M’s

  • Reese’s Pieces

  • Butterscotch Morsels

  • Rainbow Sprinkles

  • Banana

  • Chocolate Fudge Sauce

  • Gummy Bears

  • Maraschino Cherry

  • Waffle Bowl

  • Canned Whipped Cream (You can use some of the whipped cream you make, but the canned stuff is better as a topping. Everything has a purpose.)

Equipment:

This recipe starts with making whipped cream. It is possible to whip cream by hand, but nobody has time for that. I used my standing mixer. If you don’t have a standing mixer, use an egg beater. If you don’t have an egg beater, hand your most annoying sibling a bowl of cream and a whisk and tell them it's possible to whip cream into gold. Just make sure to snatch it away from them and laugh when it becomes whipped cream. Otherwise, it will turn into “food gold,” AKA butter.

  • Standing Mixer/Bowl

  • Second large bowl

  • Spatula

  • Freezable container (not glass)

Active prep total: 15 minutes

FREEZE time: 6+ hours

Clean up: 10 minutes

This isn’t the best ice cream ever, but it tastes great, and the consistency is top notch. And you don’t have to tell anyone it isn’t traditional ice cream. They won’t know the difference. If they do, it's time to find new friends!

Instructions:

  1. We are starting by making whipped cream. Pour 1 pint of COLD heavy cream into a bowl for your standing mixer. Whip it on a high setting, around 75% of your mixer’s top speed. On my mixer, there is a convenient setting called “whipped cream,” which is the 9th notch out of 12. So make it fast. 

  2. As the cream whips, you will notice the cream firming up to a stage of “soft peaks,” meaning it is capable of holding shape on its own, but still flops a little. I recommend whipping until “stiff peaks,” meaning the cream will hold whatever shape you give it, but BE CAREFUL. It takes very little time to go from soft to stiff peaks, and you can “over whip” the cream, at which point it will lose shape. I will not make jokes about soft and stiff peaks. I know you are already doing that.

    1. If you over whip your cream, pour in 3 or more tablespoons of heavy cream, and whip again. Make sure to watch it closely!

  3. In your second large bowl, use your spatula to combine the can of sweetened condensed milk, and a tablespoon of vanilla extract. Now comes the tough part.

  4. Add your whipped cream on top of the mixture of vanilla and condensed milk. You have to slowly “fold” the mixture into the whipped cream, mixing in but not breaking the structure of the whipped cream. It isn’t easy, but the result is worth it.

  5. Move the mixture to your freezable container, and put it in the freezer. You probably figured it out, but I had to tell you anyways. Now wait 6 hours for it to freeze. Or, do it overnight so you can sleep for those 6 hours and have it for breakfast.

  6. Assuming you’ve frozen your ice cream for the requisite amount of time, pull it out and just enjoy that amazing fresh look of a smooth, undefiled ice cream container. It is a pure joy of life.

  7. Now it is time to assemble! Get out your waffle bowl, warm up the fudge sauce to make it easier to drizzle, and try not to eat too many M&Ms before putting them in your sundae. Put a scoop or two (or all of) the ice cream into your waffle bowl, and add the rest of the toppings however you want to! My order was banana, sprinkles, butterscotch, M&Ms, Reese’s Pieces, gummy bears, Maraschino cherry, and chocolate sauce. BUT you should just do it however you want. Rekindle that imagination. Do it for the kid still inside of you.

This trip down memory lane feels pretty good, except for the gummy bears. It did absolutely bring me back to that sunny New England kitchen, but this time I ended up taking all the gummy bears out and eating them first. That first chocolatey, vanilla-y, peanut buttery, butterscotchy bite was ruined by the aggressive orange gummy bear flavor. Just leave them out completely. Otherwise, this will take you back to simpler times when it was just you and your best friend trying to forget how you almost caused irreparable home and relationship damage. Luckily, the fallout and embarrassment were only short term, and Tommy is still my best man. Thanks for sticking with me through the shit times, bud.

Join me next week for more Meals and Misfortune.

(Or, check out last week’s delicious disaster!)

Sundae+Image+2.jpg

Unsolicited Parenting Advice

Have you ever said something stupid, but no one corrected you? And then you spent 5 months doubling down on the same, awful statement? I hope you learn from my mistakes.

Back in 2018, the company I worked for was bought out, and I began looking for a job. Good old corporate takeovers! A few companies granted me the privilege of an interview, one of which would eventually lead to a job offer. My interviewer and future boss, Eric, was tough to read at first, but we settled into a rhythm talking about the business and personal interests. I was worried I hit the third rail when I touched the subject of our football teams’ divisional rivalry, but Eric started happily ribbing my team of “cheaters” and I knew we were going to make it. Yes, he is a fan of the Bills, and I am a fan of the GOAT.

Working with Eric has been pretty helpful to my career. We have similar personalities, but his approach to the office environment has been tempered by years of trying to figure out what really works. I tend to be “too direct,” ruffling feathers with my penchant to speak inconvenient truths, and defend my words to upper management. In my mind, this approach gets things changed quickly and for the better. In reality, people see me as arrogant and unfriendly; a “know-it-all.” Eric has caught on to these tendencies, and gives me advice on how to get people to see my side of things, rather than alienate them. Basically mind control. I’m still a work in progress, but I do find people are quicker to agree when I soften some of my statements in kinder words or tone. How am I only realizing this now? Did I miss a lesson in preschool?

Eric and I, and the rest of our team, have very candid relationships. We joke about almost everything, and have a weekly “match up” email, asking who would win unlikely battles; “The Genie vs the Fairy Godmother,” “Robin Hood vs Hawkeye,” and “a Jedi vs a T-Rex”. In general, I like to exaggerate in comedic ways to help make my point, or at least entertain my coworkers. That kind of levity seems to be appreciated and reciprocated. Humor runs through everything, so I can’t always tell when to shut it off. 

I had another lesson in my behavior when Eric announced he had his third child on the way. We showered him with the typical congratulations, and then tried to guess what his future kid would be named. No matter what we said, Eric was adamant about not telling anyone. Expecting parents won’t tell you what they are going to name their babies for a number of reasons, primarily because people will make fun of the name, or tell you how much they hate it. Most people won’t make fun of a baby’s name when attached to an adorable angel, but they will give unsolicited, aggressive opinions beforehand. I was, unwittingly, one of those people.

While my coworkers guessed names they thought would be cute, I told my boss which names I thought were terrible, and therefore should not be given to his baby. In particular, I complained about “old names,” like Dorothy, or Helen. If a name was popular in 1920, I probably complained about it, but the one name I kept harping on was Margaret, and the nickname “Maggie.” The first time I “joked” about Maggie was the day of the announcement. “Anyone who would give that name to a child wants their kid to be bullied.” I would go on to repeat my barbs every workday for the next five months. As my coworkers tried to guess the name, Eric would make a few disguised comments about how someone kind of guessed the right name, but wouldn’t say more than that. It never crossed my mind that I might be the person who “guessed” it, and that I had been poking more than my fair share of fun at his unborn child. 

After a few months, Eric was out for paternity leave, and sent out the birth announcement. I was excited for Eric and his family, but also excited to finally see what they named the baby! Moments later, my feeling of excitement turned to dread and then regret as I learned that he was calling this bundle of joy “Maggie.” I was beyond embarrassment. I turned redder than sun poisoning. My coworkers ribbed me incessantly, and told me I should look for a new job. Eric even sent me a separate email which also playfully told me my job was at risk. I apologized immediately, and then repeated my regrets as many times as I had made fun of the name. Thankfully, he was kind enough not to fire me, and I got another lesson in how big my mouth is. If only I could keep it shut.

Anyways, here is my recipe for a double cheeseburger.

IMG_9081.jpg

Ingredients:

In my opinion, this is one of the best burgers ever, and I don’t care if you disagree. You are free to enjoy any of the twelve thousand variations on the classic. This is mine. Deal with it, or go make a burger the same way you were going to anyways. Maybe you misheard me: I DON’T CARE. You should note that these burgers are huge. Even I could barely take a full bite, so keep that in mind when you decide how large you want the patties to be.


Burgers

  • 1½ lbs 80% lean Ground Beef

  • 1 Egg

  • 1 Tbsp Cumin

  • 1 tsp Paprika

  • 1 tsp Garlic Powder

  • 1 tsp Oregano

  • 1 tsp Salt

  • ½ tsp Ground Mustard

Accessories

  • ¼ lb Yellow Cheddar Cheese

  • 2 Brioche Buns

  • 1 Sweet Onion (Vidalia)

  • Romaine Lettuce

  • Whole Grain Dijon Mustard

Equipment:

This is a short list of items, and you are almost guaranteed to have them. If not, then improvise! I keep saying it, the best tool you have in the kitchen is YOUR BRAIN. So use it. Tool.

  • Large Bowl

  • Square Skillet (or pan)

  • Spatula

  • Plate

  • Big Spoon (optional, but not really)

Active prep total: 8 minutes

Bake time: 9 minutes

Clean up: 10 minutes

This is probably one of the more simple recipes I’ve made, and that’s great! We should be thankful that some things take less time to make than a cinnamon roll, and still make us happy. You deserve happiness. I know! You should make a delicious burger for yourself! You already are? Then keep going, champ!

IMG_9078.jpg

Instructions:

  1. Put 1½ pounds of ground beef into a bowl large enough to work the spices into the meat. Add the 1 Tbsp cumin, 1 tsp paprika, 1 tsp garlic powder, 1 tsp oregano, 1 tsp salt, ½ tsp mustard, and egg to the bowl. Use a spoon to mix the spices and egg into the beef, until everything is evenly distributed. You can use your hands to mix the beef, but the heat from your hands will cause the fat to melt and make your burger a little less enjoyable. Or, you can put in the extra work and make them amazing. You made it to this point, you might as well use the big spoon. We all need some big spoon in our life.

  2. When the spices and egg are mixed in, use the spoon to make 4 equal sized balls of ground beef, and place them on a plate. Then, use the spoon to flatten each beef ball into a patty! The egg will help keep the ground beef together before and after the patties are cooked. Eggs are the glue of food! I always say that. Sometimes I talk in my sleep, just to say that.

  3. Put your skillet on the stove just a click above medium temperature. You won’t need to oil the pan as the fat from the burger will be plenty to keep these burgers from sticking to the griddle. 

    1. This is also a good time to get the toppings out and ready to go. Slice up some onions and get the buns set out on plates for easy… plating. Wrote myself into a corner there.

  4. Let them sizzle for 5 minutes, then flip and add a slice of cheese to the top of each burger to kickstart the meltiness. Cook them for another 3 minutes for MEDIUM WELL burgers. I don’t believe in cooking a burger anything less than medium, so don’t ask. You’ll just have to do some experiments on your own time.

  5. The burgers are done! Stack a couple cheesy patties on your buns, and add that onion, lettuce, and mustard. Serve with your favorite fries or pickle, or nothing at all because this thing is a whole meal on its own.

As you break your jaw trying to get it around this cannonball of bread, meat, and cheese, remember what brought you here. Try not to say anything stupid, especially to your boss, and especially about their unborn child! Keep your very dumbest opinions to yourself, or get ready to trawl LinkedIn looking for a new job. Maybe you can flip burgers! After all, you did just get yourself some experience. Most importantly, remember you aren’t who you were yesterday, and you can learn from your mistakes. I’ve made a boatload of them. I once broke up with someone via text message! I learned that was a bad move, and never did it again. But that is a story for another time.

Join me next week for more Meals and Misfortune.

(Or, check out last week’s delicious disaster!)

IMG_9082.jpg

SUBSCRIBE

Flying Too Close to the Sun

I’ve always been a sun-conscious beach goer, but occasionally I slip up. I’m only human.

I was working in New York one summer, and found myself looking for ways to escape the muggy and dense island of Manhattan. The city heat was suffocating, and every morning I was drenched in sweat by the time I made it to work. My perspiration would slowly evaporate over the course of the day, just in time to do it all again on my commute home. I felt like Sisyphus getting to the top of the mountain, only to have the boulder slip from my sweaty hands, and slide back to the bottom. Hold on, slip and slide? If only I had access to one of those.

I foolishly sought refuge from the heat along the shores of Rhode Island where I grew up. New England is notoriously hot and humid in the summer, but the many beaches offer a greatly appreciated escape. Don’t get me wrong, New York is great, but the surrounding water is poison. You might choose to die of thirst before ingesting whatever toxins can be found in the Hudson, and swimming, by extension, is also super grody. On the other hand, the beach I grew up going to is immaculate, far enough from the touristy areas to avoid foot traffic. When it comes to Rhode Island beaches, you don’t want to go to the same beach as everyone else. That beach is called Narragansett- it has its own charm and some great surfing, but is touristy, and frequently overcrowded. If you want to be threatened for “interfering” in a game of “drunken bro catch,” Narragansett is the place for you.

During one brutally hot week, I planned a weekend escape to Rhode Island, and invited some friends to join me. We made it out of the city, gathered our requisite food and drink, and spent that Friday night grilling and imbibing. I passed out pantless on the deck, and only moved to my bed after waking up to use the bathroom. At least I woke up. Early the next morning, we went to the beach to watch the sunrise and then stayed for hours. The sun, by definition, was not blaring down on us when we got there at dawn. I was also pretty hungover, so I geniously decided not to apply sunscreen. Very soon, you will come to see this as a bad move. After a good amount of swimming and soaking in the sun, we decided to get some pizza for a late lunch. We debated between two of my favorite places, and finally agreed eating was more important than arguing. The winner was the closer of the two options on Google Maps. We were hungry, and the reptile brain was screaming, “Food good. No food, bad.” This should have been a clue that my systems were not working correctly.

When we arrived, I was feeling pretty good. I could tell that my skin was pink, and that it would continue to redden even without direct sunlight, but I wasn’t in any pain. Just very thirsty. I downed a full glass of ice water as we ordered, and killed the refill after our waiter came around to top me off. I was basically shotgunning water, leading to a couple cases of brain freeze. If only I had the required equipment. I slowed down, but continued rehydrating steadily until the pizza arrived. Then I started to feel worse.

In just a couple minutes, I had devoured three pieces of delicious cheese and crust at a pace that would make Joey Chestnut proud. I sat back, content with my meal, but noticed my stomach hurt. Was it possible? Had I overeaten? In another minute, I would begin to feel terrible. My bad decisions were finally catching up to me. I excused myself to the small, one person bathroom in the restaurant, and tried to figure out what was happening to me. I will sometimes get a tingling sensation in my cheeks when I’m nauseous, which usually precedes getting sick. I was having these sensations all through my head and body, but I never actually heaved. I felt faint, weak, and a bit like I was having a panic attack. I decided not to die alone in that tiny bathroom, and returned to the table to recruit my friends in saving my life.

This is where my memory gets blurry, no alcohol required. I remember reaching the table with all eyes on me. Later, a friend would tell me that I looked like I was on autopilot. I might have been. I threw my credit card down for lunch, and said “Just sign for me, I’m going to wait in the car.” My buddy Chris came and sat with me, while I writhed in pain in the back seat. On the way home, and for hours lying in a pool of sweat on the ground at home, I was in and out of consciousness. It felt gross, like being seasick but without any means to get off the boat. This was a nightmare I wanted to wake up from.

I spent what felt like eternity in limbo, occasionally coming back to reality to sip water, until I felt at least close to normal. I fought my way upright to use the bathroom, and caught my lobstery reflection in the mirror. With my head finally clear again, I could see I had been broiled. My skin was already peeling, and I even had burns on my eyelids. I flashed back to a frozen pizza I once left in the oven for two hours by mistake. It was so burnt it was unrecognizable. I had become that pizza.

Most of my friends had left to go back to the beach, but a couple stuck around to help nurse me back to health. They were happy to see that I was alive, and I was thankful that they had been there in case things had gotten worse. We talked about what could have hit me that hard, and the unscientific answer we came up with was sun poisoning. I’m not a doctor, but it does sound consistent with what I learned to get my First Aid merit badge. I didn’t have any of the worst symptoms, but dehydration, nausea, dizziness, chills, and pain are no joke. If I ever see someone in the same condition, I am calling an ambulance. Sunscreen has become even more important to me, some would even call us brothers. Please, don’t ever let this happen to you or your friends. I promise, I have suffered enough for all of us. 

Anyways, here’s my recipe for pizza.

IMG_7450.jpg

Ingredients:

This is the best pizza you’ll ever make at home, but get the crossword puzzles ready, because you will have some time to kill. Also, don’t wear white in the kitchen. The splatter from this sauce will burn you and wreck your clothes. The dough recipe is from Bobby Flay, and the sauce is from Mike Greenfield of Pro Home Cooks. They are both great references for making pizza, but seriously, who needs them when you’ve got me? (Just kidding, I wouldn’t be where I am without them.) More importantly, you’ve got YOU, you champion.

Dough

  • 4 cups Bread Flour

  • 1½ tsp Salt

  • 1½ tsp Sugar

  • 1 envelope Instant Yeast

  • 1½ cup Hot Water (110°F)

  • 2 Tbsp Olive Oil for dough, and enough to grease a large bowl

  • Corn meal

Sauce

  • 28oz can Crushed Tomatoes

  • 6 cloves of Diced Garlic 

  • 3 Tbsp Olive Oil

  • 1.5 tsp salt (rough estimate)

Toppings

  • 8 oz Fresh Mozzarella

  • 1 bunch Fresh Basil

  • A touch of Grated Parmesan

Equipment:

You don’t really need anything more than a saucepan and an oven. You should use a bowl for the dough, but hey, maybe you’re the Rambo of the kitchen. I won’t take that away, but here is what I recommend.

  • Saucepan

  • Big bowl (or two)

  • Spatula

  • Wooden Spoon

  • Ladle

  • Sheet pan or pizza stone

  • Plastic wrap

Active prep total: 30 minutes

Dough rising time: 90 minutes

Sauce time: 90 minutes

Pizza time: 20 minutes

Clean up: 15 minutes

Like I said, you’ll want to find something to do while waiting for the dough to rise and the sauce to simmer. I recommend video games; there’s enough time to win a couple battle royales, or even check on your island to make sure you got your seashells! If you don’t know what that means, then do a crossword, MOM! That being said, I love you, and thank you for your support. It’s all love. Let’s make pizza!

IMG_7403.jpg

Instructions:

  1. Start by making the dough. Get out a big bowl, and mix the 4 cups of bread flour, 1 ½ tsp salt, 1 ½ tsp sugar, and packet of yeast into the bowl. Stir it with a whisk until you see little yeast dots spread evenly throughout. You want them to have access to the flour and the sugar so they can do their best work!

  2. Add the 2 Tbsp of oil and 1 ½ cup hot water to the dry ingredients, and mix with a spatula to get the yeast wet and warm. The hot water will activate the yeast, allowing it to turn your gross flour water into actual dough. The yeast knows it is on death row, and is using this time to party before it goes to the oven. It’s ok though, the yeast understands its sacrifice is in the pursuit of pizza. May we honor our fallen yeast.

  3. When mixing with the spatula is beginning to seem worthless, start using your hands to mix the dough around, getting all the flour off the walls of the bowl and incorporated into your fledgling dough ball. Make sure all the flour is invited to this party, as it is close friends with the yeast and wants to give it a proper send off.

  4. The dough will be done when it is tacky, but not sticky. If your dough is very wet, or adhering to everything, add in a little flour and rework it until your dough is tacky like the guy at my office who wears a clip on tie. Seriously, Stan, what are you doing? He might be a secret agent.

  5. Now you will need to grease another large bowl with olive oil, or set your dough on a clean surface and clean the only big bowl you have, then oil it with olive oil. Place the dough ball in the oiled bowl, and cover the top of the bowl with plastic wrap. This is the first rise and will take about 45 minutes in a warm place. You’ll know it’s done because it’ll be HUGE! In the meantime...

  6. Make some sauce! You’re already in the kitchen, and you haven’t made enough dirty dishes. You can use store bought sauce, but it isn’t good! Make it yourself and be a tomato champ. Get your saucepan (I am using a dutch oven, same idea) and put 3 tablespoons of olive oil in the bottom on low heat. Add in your 6 cloves of diced garlic, and let them fry slowly. Wonderful smells will waft throughout your apartment, and occasionally you will think you’ve died and gone to heaven. That’s ok. This is pizza.

  7. When the garlic begins to brown, it’s splatter time! Add in your crushed tomatoes, then fill the tomato container halfway with water, and add that to the pan. Mix everything in the pan around, and leave it on low heat for an hour or so to simmer down, stirring every few minutes. At a low temperature, it isn’t at too much risk of burning, so just make sure to stir every once in a while, and make sure you aren’t wearing white! This ruined my favorite childhood sweatshirt, and now I feel awful. Not “sun poisoning” awful, but this is supposed to be a success story, not another failure.

  8. After forty five minutes of simmering and Sudoku, it’s time to go back to the dough. Flour a work surface, spread a light amount of corn meal on your sheet pan, and split the puffed up dough in half. That’s right; you have enough dough to make TWO pizzas. Lucky you! Use the floured surface to form each dough mass into a ball, then place the dough masses side by side on the cornmeal pan. Cover in plastic wrap, and let these expand to become the dough butt you’ve always dreamed of.

  9. Back to the sauce. Your sauce will be done when it is somewhere between solid and liquid. As you move your spoon through the sauce, it should fill in behind, but you should also be able to see the streaks where you waved your spoon. It’s a delicate balance, but getting it right will be a dream come true. Take the sauce off the heat, and add some salt until it is a perfect level of flavorful and tangy. I slowly added salt, tasting as I went to make the ideal sauce. I think it took about 1.5 tsp. If that isn’t enough, add more! Your tastes are unique, so figure out what works for you!

  10. Once you have achieved a zen-like sauce, you are ready to make pizza. This is the right time to PREHEAT YOUR OVEN TO 500°F. You can make two pizzas now, or save some dough in plastic wrap for later. Just make sure it goes in the fridge. On the same floury surface, work your dough ball into a disc, taking care NOT TO CRUSH THE EDGES. I can’t stress this enough. I used to make pizza and shove dough into the corners of the pan to make a good crust. That is NOT how crust is made. You have a light, fluffy dough. Crust is the result of letting the outside of your dough disc stay inflated! You will be so glad you did this. Push down the center of your dough ball with your finger tips, leaving the edges inflated. Pick up the dough without smushing the edges, and drape it over a closed fist. Position both fists just under the crust edge, and let gravity pull the dough into shape as you move the dough over your hands. After a little while you will have a well-shaped dough with a fluffy crust! My crust had to be elongated to fit on the pan, so work with what you’ve got!

  11. Now we’re getting somewhere. Spread some cornmeal on your pan or pizza stone, and place your dough gently on top; in my case I used the same cornmeal pan used for the second rise. You do not want the pizza to stick to the pan, or you will have a lot of clean up and very little pizza. When you have your dough in place, spoon some of that amazing sauce on top and make sure it is spread evenly-- enough to cover the dough without covering the edges, unless you like that! Cut your 8 oz of fresh mozzarella into slices, and place them evenly across the dough. Find some perfect basil leaves, and place them evenly on top. You can also paint your crust with some melted butter if you would like. Don’t be held down by the tyranny of big pizza chains! YOU TOO can have a buttery crust at home! Mmmmm. Delicious.

  12. If you are keeping up (which you totally are, you beast), the oven should be ready to go! Pop your pizza in the middle rack, and check back after 8 minutes to make sure it's smelling as good as you dreamed about. It should be done after about 10 minutes, or when the crust is being all crusty, and the cheese has fully started to bubble. Oh pizza, you devilish vixen.

  13. Pull that beautiful creation out of the oven, and try to wait a few minutes to protect your mouth. It is HOT. Cut it any which way you want, and add a little parmesan cheese if you care to. Parmesan to a pizza is what bacon bits are to a salad. Except pizza isn’t like salad; it’s way better.

Are you ready? Stop torturing yourself. Stop taking photos. You trudged through the tomato sauce swamp, you sliced your way through mozzarella jungle, you got broiled by the center of our solar system, and now you find yourself in pizza paradise. Sit and bask in that delicacy of youth, transformed into the nirvana of now. This is something to enjoy, even if you are sunburned beyond repair. You may not heal physically, but you can still patch that hole in your soul with just one bite of pizza. And you have the whole pie. Lucky you.

Join me next week for more Meals and Misfortune.

(Or, check out last week’s delicious disaster!)

IMG_7456.jpg

SUBSCRIBE

Dessert to Die For

A few months ago, before all this “quarantine” stuff started, I was sick. Deathly sick. All I wanted was something sweet, but I couldn’t even keep saltines down.

I had already been to Urgent Care once with a laundry list of symptoms. Three days later, I was even closer to death. My statistical performance was worsening like Brett Favre when he hit 40. I had lost 12 pounds in under a week. My body temperature could be mistaken for a hot tub thermometer. I was sleeping less than Navy Seals during hell week. Dante’s Inferno looked like a Hello Kitty birthday party.

I went back to the same Urgent Care, with the same administrator working reception. She made sure to let me know that coming back “was only a recommendation,” and “really not necessary.” This is the sage wisdom that comes with dropping out of high school and deciding that you could still find a “career.” I told her I would let the doctor decide what was necessary. 

I was called back to see the Physician’s Assistant, which is basically a doctor but with less malpractice liability if I were to die. She wrote down everything she thought I could have, crossing them off the list as I described my symptoms and lifestyle in excruciating detail. Not an STD, not a fungus from Peru, not something I made up to get out of a math test. She ordered the same golden shower test from the week before, as well as a blood test, chest X ray, and finally, the golden goose of every medical examination, a stool sample.

The way it was described seemed daunting even without the issues I was facing at the moment. I was given a large plastic bag with the necessary ingredients; three test tubes, two pairs of non latex gloves, one plastic cereal bowl, and a partridge in a- I mean, instructions documenting how this awful puzzle was to be assembled. The PA told me to do this myself the next day, as the medical facility didn’t have a refrigerator for my sample, which would be needed to preserve the integrity of my results. I was told I would have thirty minutes from the time of my “deposit” to drive myself and my bacterial copilot to the testing facility, as if doing the trading game sequence from Ocarina of Time. Except this version of Link was sleep-deprived and fever dreaming, and noticeably without a “Save and Exit” option.

Soon after returning home, I got a call from the PA. Again, “nothing abnormal,” but I would have to wait for the specialist to look at my chest X ray, and it would still be best to bring in my stool sample. Ok fine, no news is good news. Maybe this thing would finally work itself out, and I would wake up feeling magically better.

No such luck. I woke up the next morning feeling like four pounds of excrement in a two pound bag. Up to this point I was lucky enough to have my girlfriend chaperoning all these Urgent Care visits, but my next adventure would have to be my own. Through bleary eyes and a foggy mind, I wished her a good day at work, and went to do my job in the bathroom.

I don’t want to get into all the details, but some are important. The instructions said if my bowel movements were “somewhat liquid,” I would need to make a “slurry” out of the solids and liquids, to get the full effect of the test. It met those requirements. I did what was necessary. Each vial had a lid with a small spoon to facilitate combining my “assets” with their test tubes, each already containing an amount of solution that would be needed for specific tests. I have never felt so excited to reach a “fill to this line” mark in my life. I put what was necessary in the large plastic bag, and threw everything else into the trash. Thankfully it was garbage day, and they hadn’t yet stopped at my house. Good riddance.

Believe it or not, there are a million more painful details of that story that I will bless you by not including. You’re welcome.

I hopped in my car with more culture than a street fair, and deliriously drove myself to and from the test facility. Thirty minutes after I got home, I got a call from the lab. There was an issue. The vials with solution already in the tubes were the wrong ones for the tests I needed. Since the “assets” were mixed with the incorrect chemicals, I would need to redo the sample. Now I could finally pinpoint the lowest moment of my life. Move over getting broken up with via AIM chat, we have a new rock bottom. I quickly entered the first stages of grief and hung up the phone, dejected. 

I stewed for an hour until I received yet another phone call, this time from the PA. The specialist had looked at my chest X ray and found that I had asymptomatic bacterial pneumonia. She told me I needed a prescription for antibiotics, or this infection would eventually take my life. Finally, some good news! I told her where she could send the script, and then asked if I needed to go back and give a stool sample. She said no! I felt like a Thanksgiving turkey getting the presidential pardon. I don’t know if I believe in God, but I do believe this woman’s phone call was a miracle. I am alive today because she made the right diagnosis, and saved me from having to poop in yet another cereal bowl. 

Anyways, here’s my recipe for Chocolate Lava Cake.

IMG_7158.jpg

Ingredients:

This is ridiculously easy. It takes 20 minutes to prepare everything and only 5 minutes in the oven. I adapted this recipe from Jean-Georges Vongerichten, the apparent creator. There is a dispute about who should get credit for inventing this dish, but to me it's far more important that I get credit for teaching you. And then you can take credit for making them and impress that special someone. And that special someone can take credit for having you as a friend. Or maybe more than friends. But first, go make a cake. And leave the story out of it. It’s gross.

  • 4 oz Unsalted Butter

  • 4 oz Unsweetened Chocolate

  • 4 Large Eggs

  • ½ Cup Sugar

  • 1 tsp Salt

  • Cocoa powder to line pan

  • Powdered Sugar (optional)

  • Ice Cream (optional)

Equipment:

I try not to buy additional equipment to make recipes, because I want to be versatile. I don’t want to be afraid of a recipe because it calls for a “tagine.” I WILL FIGURE IT OUT. For this recipe, I used my only muffin tin which is fairly small, but you can use bigger ones too. Maybe YOU should learn to adapt, you fossil. 

  • Medium Bowl

  • Small Pot

  • 6 cup, 3 oz Muffin Tin

  • Kitchen Brush

  • Sheet pan

Active prep total: 25 minutes

Bake time: 5 minutes

Clean up: 15 minutes

IMG_7152.jpg

Instructions:

This takes so little time and effort, you will wonder what you’ve done wrong. NOTHING. Conjure up your inner Scott Pilgrim, lose the self doubt, and replace it with a little self respect.

  1. Melt the butter in the small pot on the stove at LOW temperature. One click up MAYBE, but low and slow is your best bet.

  2. Use your kitchen brush to line the muffin tin with the melted butter. You won’t need much to line the tin; the rest will be used in the cake itself.

  3. Now you need to add the chocolate in with the butter to melt. Again, keep it low, or this stuff will burn and ruin everything. Low and slow. Stir occasionally, until the butter and chocolate soul bond.

  4. While the butter and chocolate in the pot get to know each other, put a little cocoa powder into each cup of the muffin tin. Hold the tin and swirl it in circles to spread the powder. The butter and cocoa will create a layer that keeps the cake from sticking to the tin. Dump out the excess powpow, and preheat the oven to 450°F.

  5. Crack 2 whole eggs and two egg yolks into your medium bowl. Add ½ cup sugar and stir until it becomes pale, which should take a minute. It took me three separate twenty second bursts, because I’m weak and have bad lungs. You can do better. Prove it.

  6. Hopefully your chocolate and butter are melted together, and unburnt. Pour it into the egg/sugar mixture and whisk that dreamy batter. Oh yeah. Now you see it all coming together.

  7. Pour the batter equally into each cup of your muffin tin. Take a picture, post it on Insta. Make that one ex jealous. Sorry, Tabrina.

  8. Put the tin into the oven. Set a timer for 5 minutes. In my oven, this made the perfect interior of oozing molten chocolate. If you are using a different size tin, you can be sure that the exterior is cooked when it loses the shiny, oily surface. That is all you need.

  9. When you pull it out, you don’t have to rush, but you don’t want to futz around either. Place your sheet pan on top of the tin, and flip the whole thing over so that the cakes come out onto the sheet. Now you have perfect little chocolate volcanoes.

  10. Here comes the magic moment. You can serve these as is, or you can sprinkle a little powdered sugar on there, add a scoop of ice cream, maybe even drizzle caramel on top. It's your life, live it your way. But please, you worked hard. Cut in and watch the chocolate lava ooze out. Be proud, you made that.

Now you’ve added an amazing dessert to your repertoire, one that’s easy enough to remember after one try, and that you can whip up at a moment’s notice. And you learned way too much about pneumonia! Now, if life ever throws you into a nasty situation, you will be more than prepared to handle them yourself. And with a little chocolate and sugar on top. Delicious.

Join me next week for more Meals and Misfortune.

(Or, check out last week’s delicious disaster!)

IMG_7165.jpg

Subscribe

Settle an Old Quarrel

It was the best cinnamon roll I’ve ever had, even if the person who made it got me fired.

I have changed a lot since high school. Back then, I had a job bussing tables and running food. It would be an understatement to say I didn’t fit the bill. I was young and hated authority, despite being the least experienced person on waitstaff. I thought I was god’s gift to humanity, but everyone else thought I was Napoleon Dynamite. It was my junior year of high school and I needed a job to afford the ever increasing expenses of life-- a personal finance lesson I have kept with me ever since. I put in an application at every restaurant in town that didn’t have a dollar menu, and only got one call back. I was immediately turned off from working there in the way you avoid any club that would have you as a member. But, I didn’t have any alternatives, and needed the money. After a couple interviews full of smiles and lies, I got the job.

It all started off pretty well. The work wasn’t difficult, I just had to do my responsibilities at the right time. First: I did prep work. I cleaned the floor and replaced the mats, threw dinner rolls in the oven, made sure garnishes were prepared, scooped butter into ramekins, prepared table settings, and so forth. It felt like an extension of chores. Then service started and I would bring rolls and drinks out to patrons, then meals, and anything else they asked for in between. When they left, I prepared the table for the next group. I had to work quickly, but none of this was rocket science. I’ve seen service dogs capable of more complicated task switching.

I would relive that exact cycle for months, with the exception of Sunday brunch. To customers it may have felt like magic, but it was really a bunch of lowlifes setting up and running a buffet. We brought out tables, chafing dishes, and carving stations,  and then that wonderful combination of breakfast and lunch foods we revere as brunch; bacon, sausage, waffles, french toast, bread, omelettes, antipasto, salad, pasta, prime rib, and pastries. If I close my eyes and breathe deeply, I can conjure images of the angry patrons wondering why there wasn’t any fruit salad left. The only maintenance was to replenish whatever ran low, and smile while refilling that fruit salad. It was easy work, and the largest payday of my week. I’d put in a couple extra hours, but I would tip out close to two hundred dollars. It was my favorite work day. I was even slowly becoming a better employee, until Mother’s Day, when it all came crumbling down.

Mother’s Day brunch wasn’t like other Sundays. This time, the restaurant went all out with decorations and even an ice sculpture honoring our matronly patrons. The place was packed; I was busy trying to keep everything stocked, and crushing it. Between buffet management, helping waiters, and gritting my teeth through both disappointed and suggestive comments from perimenopausal women, everything was going great. That is until I stumbled into a mountain disguised as a molehill.

A beautiful older woman gestured for my attention, and asked me which cookies had nuts in them. She was looking at the dessert display, trying to figure out which would put a smile on her face, and which would throw her into anaphylaxis. A reasonable quandary. I made sure to specify if she was allergic to tree nuts or peanuts, and excused myself for what I thought would be a minute to ask the pastry chef. I popped into the kitchen and found her working a giant ball of dough, making some delightful treat for later on. I can’t stress to you enough, I was in a good mood. Money was coming in, I had a couple sweet rolls in me, and I was getting hit on by older women. I was living my own version of Katy Perry’s teenage dream.

I asked the pastry chef if any of the cookies had nuts in them, and she said only the peanut butter cookies had nuts. I should have stopped there, but I saw a problem. I tried to clarify if she was worried about trace amounts of tree nut contamination, and she said the concern was that it was pretty much chock full of peanuts. And right then a seventeen year old buffoon butted heads with a dessert professional more than fifteen years his senior who had no idea that peanuts did not grow on trees.

We went back and forth in heated competition for about four minutes, by which point I realized the cougar was still waiting for me back at the cookie table. I told the chef to shove a walnut and went back out to check, but the milfy matron had vanished. I didn’t see anyone choking to death or breaking out in hives, so I just let it go and continued working. I tried to avoid the pastry chef for the rest of the day, but occasionally caught her shooting me eye daggers. I ignored it, finished my shift, and clocked out, content knowing that I had brought in a treasure trove of hot mom money.

Three days later, I was playing pool basketball when I got a call from my manager. She told me I was being fired; It was unprofessional to argue with people at work, and I had caused a scene. I told her that people in their thirties shouldn’t tattle on people half their age, and that it wasn’t my fault the culinary school idiot didn’t know the difference between peanuts and tree nuts! Surprisingly, management stuck with their decision to fire me. I went back to playing basketball in a pool, with a smile on my face.

Just a couple weeks ago, that business closed permanently. I was a little sad I never went back there. I don’t hold any ill will toward them, except they let a pastry chef get away with not knowing the difference between peanuts and tree-nuts. I would think that is an important distinction for someone in a restaurant who needs to understand food allergies, especially if they work in pastries.

Anyways, here’s my recipe for Cinnamon Rolls.

unnamed.jpg

Ingredients:

I saw the pastry chef make these a few times at the restaurant and have a rough idea of how to reproduce them on my own. However, this was a few years ago so I looked up 20 different recipes to see what rang a bell. I might be getting some of it wrong, but the buns came out great so I am not leading you into the wilderness. If you follow these instructions and consider that Chopped has a competition for children, YOU WILL SUCCEED at this recipe.

Buns

  • 6 Tbsp Unsalted Butter (room temperature)

  • ⅔ cup granulated sugar

  • 1 egg (room temperature)

  • 1 LB bread flour

  • 1 packet of instant yeast (¼ oz)

  • ½ tsp salt

  • ½ cup whole milk (warmed to 100°F)

  • Peanut or other oil to line bowl

Filling

  • ⅓ cup white sugar

  • ½ cup brown sugar

  • 2 Tbsp cinnamon

Frosting

  • 8 Tbsp butter (room temperature)

  • 8 oz cream cheese (room temperature)

  • 1 ½ cup powdered sugar

  • 1 tsp vanilla

Equipment:

If you have a dough hook, you’re in good shape. I don’t have a dough hook, so I mixed this by hand, and felt the pastry chef laughing at me from the spirit world. I don’t think she died, so I’ll just assume it was astral projection. You can do this all with a whisk if you need to. Seriously, just try it.

  • Stand mixer

  • Big bowl

  • Rolling pin

  • 9” x 13” pan (mine was pyrex)

  • Parchment paper

Active prep total: 68 minutes

Dough rising time: 120 minutes

Bake time: 20 minutes

Clean up: 25 minutes

Yeah, it takes a while, but it's magic. Do you think Cinnabon makes money because magic is easy? No. It isn’t easy. It takes careful ritual. It takes work. And it pays off because everyone loves these.

  • Making the dough: 40 minutes

  • Making the filling: 5 minutes

  • Rolling and cutting: 15 minutes

  • Baking: 20 minutes

  • Making the frosting: 8 minutes

  • Resting: 10 minutes

CinnaRoll1.jpg

Instructions:

  1. Start by using the whisk on your stand mixer to get the 6 Tbsp warm butter, ⅔ cup sugar, ½ cup warm milk, room temperature egg, ½ tsp salt, and yeast all familiar with each other. About 3 minutes on low to medium. Think of it as the ingredients speed dating.

  2. Then add in the flour. You don’t have to do it slowly, but this is where you want to go with a different attachment or dough hook. I used the whisk and all my dough started to come together nicely, but then got stuck in the whisk. Fight through adversity. I scraped everything off the whisk attachment, and did the rest with my hands which came out very nice. Knead the dough for 10 minutes using either method. I could be wrong, I am not an expert.

  3. The dough should be ready! Oil the big bowl with the peanut oil to get back at that pastry chef! But seriously, I use it because the flavor isn’t strong and doesn’t interfere negatively with the dough. Plop your dough in the bowl and cover with plastic. This will need to sit for 90 minutes for the yeast to do its work.

  4. Now that we have some time, you can make the filling. There are differing opinions on melted butter vs soft butter vs no butter, but the no butter method tastes amazing and won’t leak out the bottom of the buns. So I’m sticking with the dry filling. Simply mix the ⅓ cup white sugar, ½ cup brown sugar, and 2 Tbsp cinnamon in a bowl.

    1. I also pulled the cream cheese and butter out at this point to warm to room temperature.

  5. Once the dough has risen, back to the hard work. Oil a surface to work the dough. You can use flour, but using oil will keep more moisture in the dough, and will have better results. Knead the air out of the dough, then roll it into a rectangle about 14” x 20” inches.

  6. Spread your filling over the dough evenly, then roll the dough tightly along the long edge. Cut 1 inch off each side, then make divots in the dough to plan how thick you will cut each roll. I used this method to make 11 evenly cut rolls, so each was about 1.5 inches thick. Use a serrated knife, and make your dreams come true.

  7. I then placed these into the oiled and parchment paper lined 9”x13” pan, with 4 across each long edge, and 3 in the open spaces in the middle. If that’s too confusing, they should be spaced the way the stars are spaced in the American flag. 

  8. Now, cover your pan with plastic wrap, and wait another 30 minutes for them to plump up. These bad boys will start to bump up against each other like EDC Vegas, and that means they are almost ready for the oven. Oh, while you’re waiting, preheat the oven to 375°F, and melt a couple tablespoons of butter in a small bowl. You can use a microwave, stovetop, or hairdryer. Anything above 90°F, but the microwave is quickest.

  9. When the cinnamon boys are bumpin, brush the melted butter on the tops so they get a sweet tan at the bun beach. Throw them in the middle rack for 18-25 minutes. Start checking them at the 18 minute mark to see if they are the desired level of brown.

  10. While the buns are cooking, make your icing. If you’re worried it will take a while, make it before you throw the buns in, but it won’t take long at all. You want the icing ready when the buns get out. Back to the standing mixer! Mix your 1½ cups of powdered sugar, room temp stick of butter, room temp package of cream cheese, and teaspoon of vanilla at medium speed. It will take about 2 minutes.

  11. At the ideal brown point (mine was 21 minutes), take the buns out and get that cream cheese icing on top ASAP. It will melt into all the cracks and mix with the filling from earlier, making the magic permeate every bite.

  12. Wait 10 minutes for these to cool as they hold the heat well. 

unnamed-2.jpg

And you are done! The icing has melted in, and your grudge is melting away. Maybe you’re even taking responsibility for how you acted and what you said. You realized even if your information was right, the way you handled it totally out of line, and that’s a powerful lesson. Now look at you, learning from mistakes. You took your sad past, and turned it into your happy future.

Or maybe you didn’t learn anything. But, I learned that. Either way, enjoy your culinary handiwork. You earned it.

Join me next week for more Meals and Misfortune.

(Or, check out last week’s delicious disaster!)

Subscribe

Eat Your Feelings

There’s nothing like crying into a bowl of your favorite food.

I’ve had a few false starts in my dating career. My first was in fifth grade when I asked my crush, Jenny, to be my girlfriend. I was hopelessly infatuated, and like Peter Frampton, I needed to know if she felt “like I do.” To my surprise, she said she liked me too, and what ensued were the highest flying six and three quarters days of my life.

During that almost week, I was invincible. Jenny and I talked on the bus, rode bikes through the neighborhood, and even held hands. Scandalous. I daydreamed about our future, about being the rare couple that found true love so young, and could make it last forever. My parents were high school sweethearts, why wouldn’t it work for an ignorantly blissful romantic in love for the first time? Now I realize, I was an idiot.

Back in the early 2000s, AOL Instant Messenger was my version of social media. Nothing could elevate your social status like the combination of AIM and a T-Mobile Sidekick. Not even a Motorola Razr. I wouldn’t get a cell phone for at least another five years, so the only way I could hope to be that cool was by making a perfect AIM profile. The AIM profile was your first online impression, like the clothes of the internet. Good clothes make a good impression, and to me, there was a direct correlation between a good profile, and having a girl like me. I worked hard on my own, including friend shoutouts, song lyrics, and edgy thoughts to get anyone to care. I spent weeks internalizing Jenny’s profile, and months trying to make my own look cool. Spoiler warning; it didn't work. I worshipped at the AIM profile altar, and thought it had paid off by getting to date the girl of my dreams! Instead, I would find my life’s worst embarrassment at the hands of my obsession.

On day six of invulnerability, my best friend, Cameron, messaged me on AIM. He told me to brace myself before looking at Jenny’s profile. I already looked at her profile earlier that day; What could I have missed? But I trusted Cam, and when I clicked in I saw that it had changed completely. 

Jenny’s profile had a different color scheme and even font than I had seen just hours ago. I was worried; To my adolescent brain, this was like renovating a house. Jenny had ripped her profile down to the studs, and rebuilt it like a goth nightmare. I was taken aback by the black background, and I was scared to even look at the white words in contrast against it. What I read will stick with me for the rest of my life. 

Jenny had written an open letter breaking up with me. She said that while she liked me as a person and as a friend, she never liked me as anything more than that, and only went out with me “to be nice.” Absolutely scandalous. I was devastated. And furious! I knew Cameron had seen it, but imagined everyone else at school finding out my relationship ended before I did. And that it only even existed out of pity. I felt like a rescue dog being returned to the kill shelter. Through tears, I mustered up the courage to chat with Jenny, but I got her away message, “brb, hw.”

I went upstairs and did the only thing I knew how to do; threw some leftover mac and cheese in the microwave, and ate my feelings.

Anyways, here’s my recipe for Mac and Cheese. 

IMG_6794.jpg

Ingredients:

I started with a recipe from Basics with Babish, and changed things based on my tastes. That’s what it’s all about, learning from the greats and making it your own. One thing you have to keep is the mustard. All my friends who don’t like mustard loved it in this case. All two of them.

This involves making a bechamel sauce. If you think that’s too difficult, reread the above story on the heartbreaking misfortune of an 11 year old boy. Realize you can put your grown-up pants on and figure it out. I did it on my first try BY BELIEVING IN MYSELF. You can too.

  • 1 pound dry medium shells pasta

  • 6 oz shredded Parmesan

  • 6 oz shredded Gruyere

  • 6 oz shredded Sharp white cheddar

  • 9 oz shredded Mozzarella

  • ½ cup unsalted butter

  • ½ cup white all purpose flour

  • 4 cups whole milk

  • 1½ Tbsp salt

  • 1 tsp black pepper

  • 2 Tbsp Whole grain mustard

Equipment:

You don’t have one of these things? Improvise. I don’t have a saucepan, I have a dutch oven that is way too large. It was like hanging a painting with a sledgehammer. But I made it work. Figure it out, I’m not a babysitter.

  • Cheese grater

  • 9” x 13” ceramic baking sheet

  • Large saucepan 

  • Large pot

  • 2 Large bowl (one must be HEAT PROOF)

  • Colander

  • Whisk

Active prep time: 45 minutes

Bake time: 45 minutes

Clean up: 20 minutes

Let’s be real, no one tells you the truth about prep time, OR clean up time. If they did, you’d never embark on the mad journey to make whatever insane treat you think you deserve. A pro might be able to achieve gold medal prep times, but it's ok that you take longer. I’m not a pro, I can’t do four things at once. This is how long each step actually took:

  • Cooking the shells: 15 minutes

  • Shredding cheeses: 10 minutes

  • Making Bechamel: 15 minutes

  • Bringing it all together: 5 minutes

  • Baking: 45 minutes

  • Resting: 10 minutes

Instructions:

Before you begin, conjure up all your feelings about what happened with Jenny. Worried about failure? GOOD. Now you have to succeed. You’re welcome.

  1. Make your pasta shells according to the box. This is where the big ol pot comes in handy. Salt your water at least a little, but you’ll add a good amount to the recipe later so don’t go too heavy. 

  2. While you’re waiting on the shells, start shredding the different cheeses into your large bowl. Don’t get so lost in the rhythm of shredding that you forget to stir the shells. You do not want those bad boys burning to the bottom of your pot.

  3. Put the colander in the sink. When the shells are finished cooking, pour them into the colander. Duh.

  4. Finish grating the cheese, if it took you as long as I did. I was grating for a long time. Mix the cheese around so it’s evenly distributed, and SET ASIDE A HALF CUP of the blended cheeses for later. You want this done before you start the...

  5. Bechamel! Get the flour, butter, and milk ready. And while you’re at it, preheat that oven to 375°F.

    1. Put the large saucepan on medium heat, and melt your ½ cup butter. You want to make sure to stir the butter around to avoid any explosions. The butter will start to bubble and foam. 

    2. After about three minutes, the bubbly, foaming butter will have white milk solids floating on top. This is when you add in the ½ cup flour. I was terrified I would burn everything, so I whisked in the flour as quickly as possible. Stir it around for another 3 minutes letting the butter and flour make nice and become best buds again after their big fight. They will start to resemble wet sand. Perfect.

    3. Now, this is where I got nervous. Don’t panic, and take your time. You have to add in the 4 cups of milk SLOWLY. Pour in just a bit, and mix it in so all the flour butter mixture absorbs the milk. At first it will start to get thicker, but it will thin out as you add more milk. Keep stirring and SLOWLY adding milk, and you will be golden. I’m not telling what happens if you do it wrong.

    4. When you have fully combined the mixture, it will resemble milk. Imagine that. Now, turn the heat up to medium/high and keep whisking. In about three minutes, this will thicken up a bit, which means you did it! Bechamel legend  over here. Look at this guy, Johnny Bechamel. Is that a hockey player? Who cares! Next step!

  6. You’ve made it through hell week. Congratulations, you’re a Mac and Cheese SEAL. But you’re not finished yet, soldier. Your first mission, should you choose to accept it, is to mix the bechamel and cheese in a HEATPROOF bowl, melting all that sauce and cheese into another magical sauce. Whisk it real good. When you’re confident the cheese has blended in at the cool kids party, add in the 1½ tablespoon of salt, teaspoon of black pepper, and 2 tablespoons of whole grain mustard. Add whatever else you want to change the flavor, but you don’t have to. I wouldn’t recommend Gatorade, but I’m not going to ground you. Just keep whisking. Work those forearms. Feel the burn. Now you’ve almost earned it.

  7. Get that 9” x 13” pan and fill it with your shells. Then pour the bechamel on top, and mix it in with the shells. These shells will hold the sauce and be like little butlers delivering delicious flavor to the millionaire in your mouth. Your tongue, I mean. You know what I meant. Now, use that ½ cup of cheese mixture we saved up in step 4 to cover your whole pan in more cheese. Perfect, you did it. Pat yourself on the back. Who cares what happened with Jenny? You got this.

  8. Place that pan of cheesy gold in the oven on the middle rack for 45 minutes. Now buckle up, because you can’t relax yet. DO YOUR DISHES YOU SLOB. Ok, I get it. I didn’t know you were already doing them. I just think it’s important to clean. Sorry. Jeez.

  9. 45 minutes ago, you were a baby, a know-nothing who thought you bit off more than you could chew. Now look at you. You used a fancy french word, became a Mac and Cheese SEAL, and cleaned dishes on your way to the top of cheese mountain. Sit back on your throne of cheese, you earned it. If you can, try and wait 10 minutes for everything to settle and not melt your face. Then call the Jenny in your life! Tell them you aren’t a failure! You are a Mac and Cheese millionaire. Be the bigger person, and offer Jenny a bite. She could be in a bad place, and maybe she needs a friend. She definitely needs some mac and cheese. We all do.

I hope you learned something today. No matter what happens, you can be a success. Don’t dwell on the negative; learn from it. Turn tragedy into a treat. Turn failure into food. Turn your misfortune into a meal.

Join me next week for more Meals and Misfortune.

IMG_6810.jpg

Subscribe